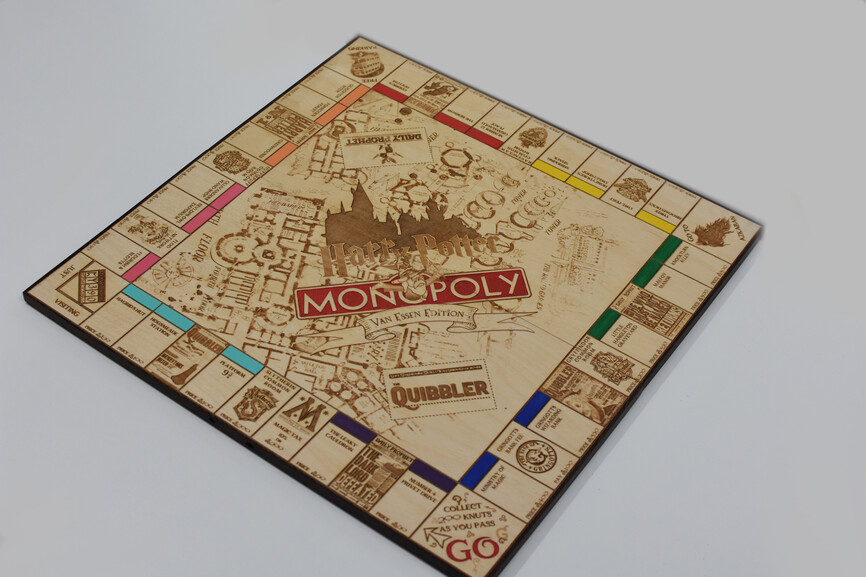
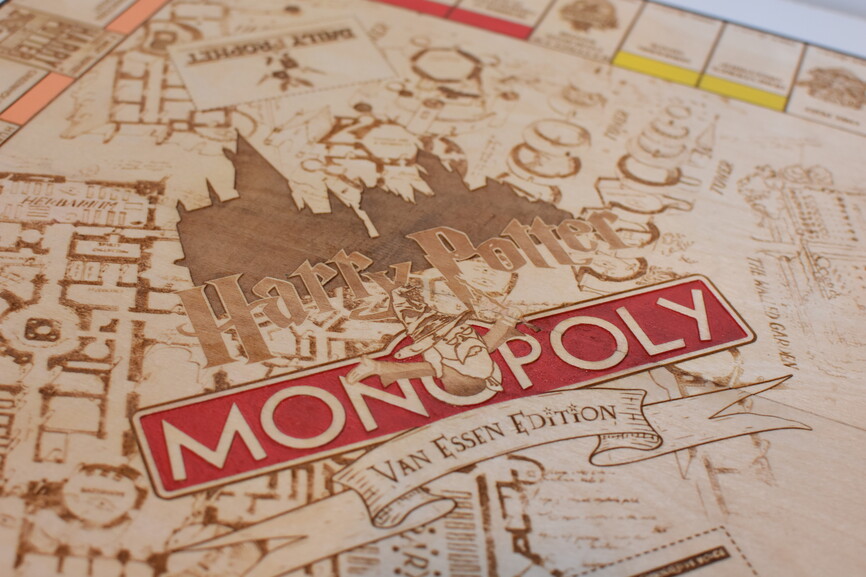
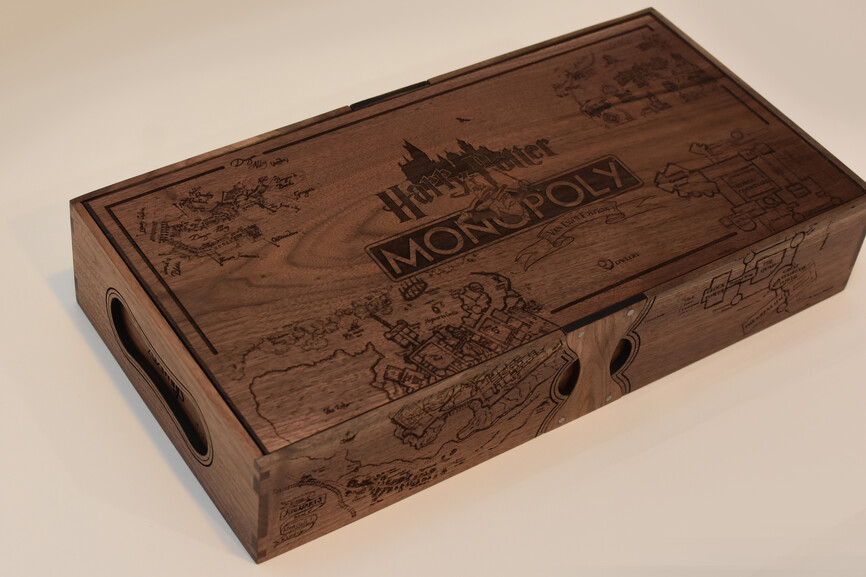
I was inspired by pubultrastar to make my own variation of Harry Potter Monopoly. I gave this to my daughters as a Christmas gift. It was incredibly time consuming and definitely helped me brush up on my Harry Potter knowledge as well as hone my Adobe Illustrator skills! ![]()
If you’re interested in making your own, I have files available for purchase on my website, cravecraftonline.com.

Here are some of the details about how I made it…
Materials:
-
1/8" & 1/4" Baltic Birch plywood
-
3/16", 1/4", & 3/8" walnut hardwood
-
3/4" hard maple cubes
-
Card Stock (yellow and orange)
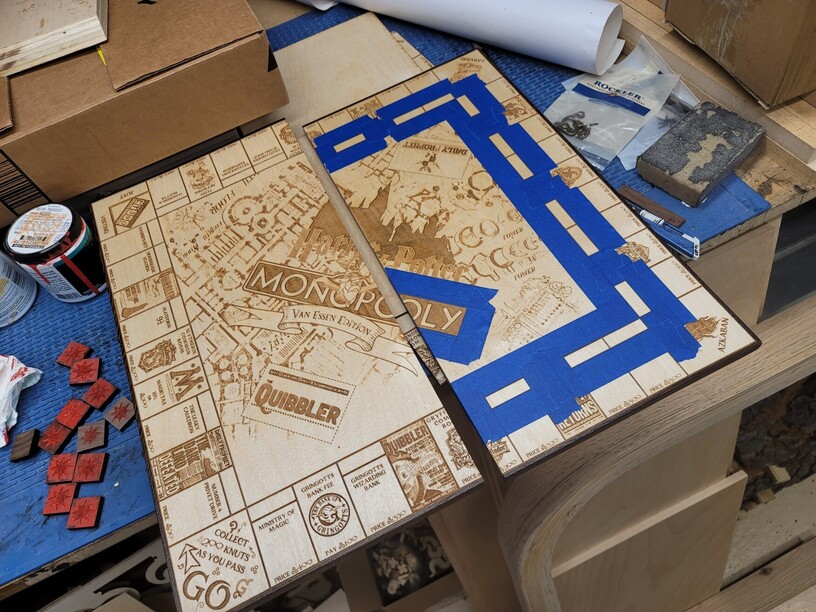
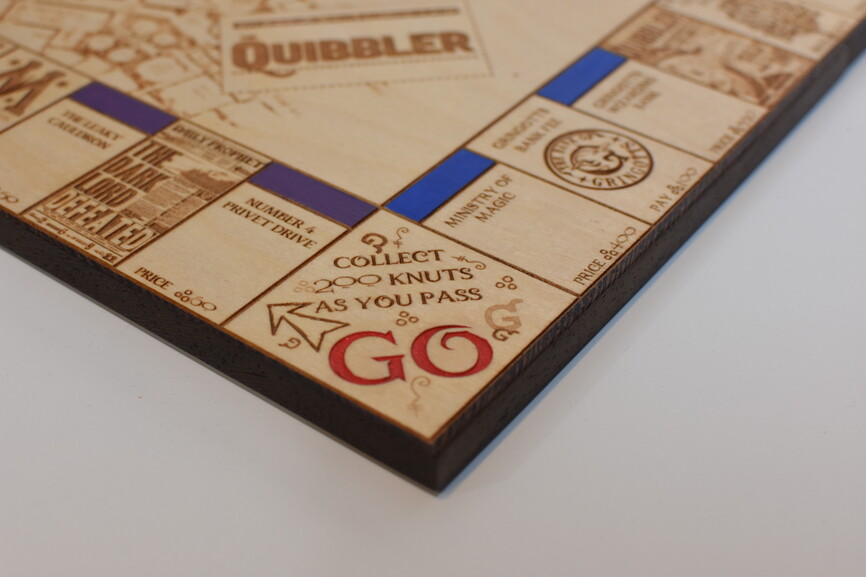
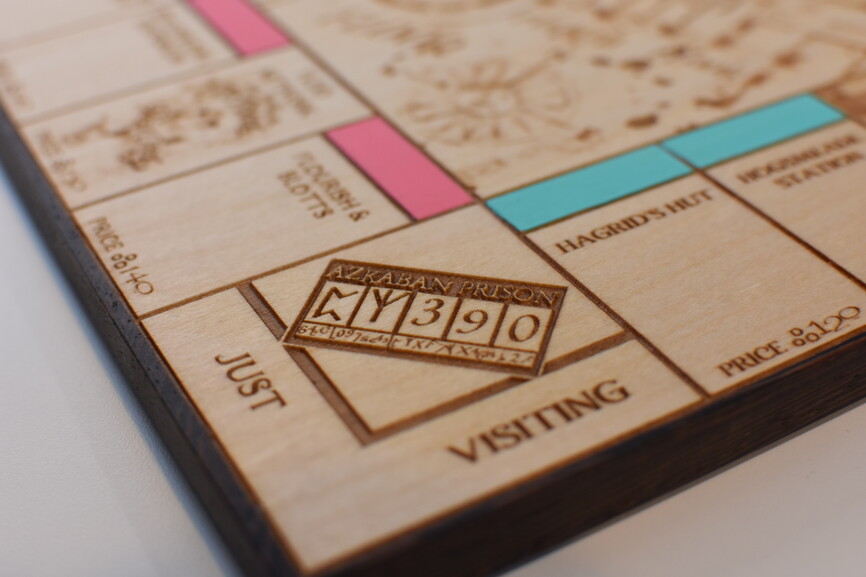
Game Board
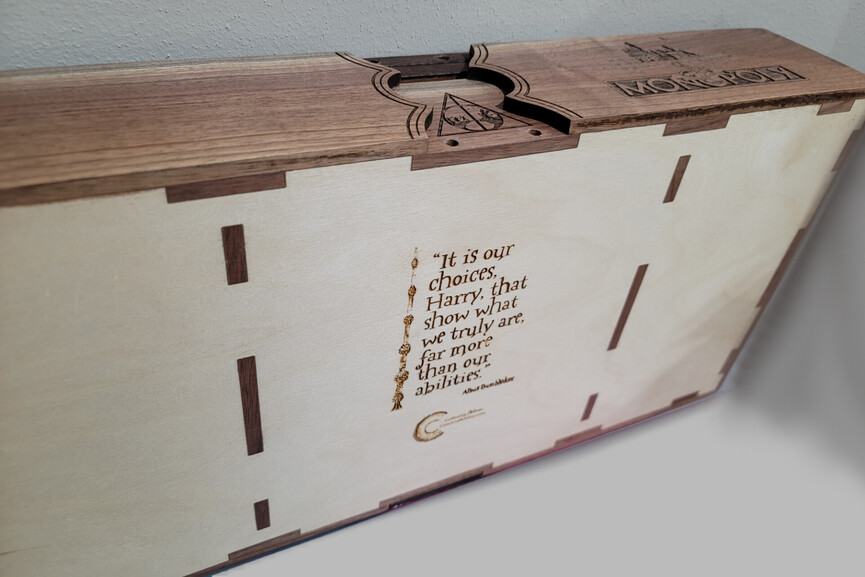
I engraved the board on 1/8" Baltic Birch plywood (using SD Graphic setting for maple plywood) then glued the plywood to 3/8" walnut (to make sure the edges ended up flush I kept the walnut slightly oversized and then after the glue dried, I used a flush trim router bit to trim it down). I then glued thin pieces of Wenge wood around edges as trim. After everything was glued, I engraved the bottom side of the board section that would be facing up when placed as the top of the box (using SD graphic setting for walnut hardwood).
I used three coats of Minwax Wipe-On Polyurethane on the walnut sections (the oil-based finish brings out the color of the walnut nicely) of the board and three coats of General Finishes brand Polyurethane Water Based Top Coat on the plywood (the water based finish doesn’t yellow the plywood significantly). Then I hand painted the colored sections of the board using latex paint. Note: it is much easier to wipe of mistakes if you apply the clear finish first and this also prevents streaks from the paint absorbing into the grain of adjacent areas.
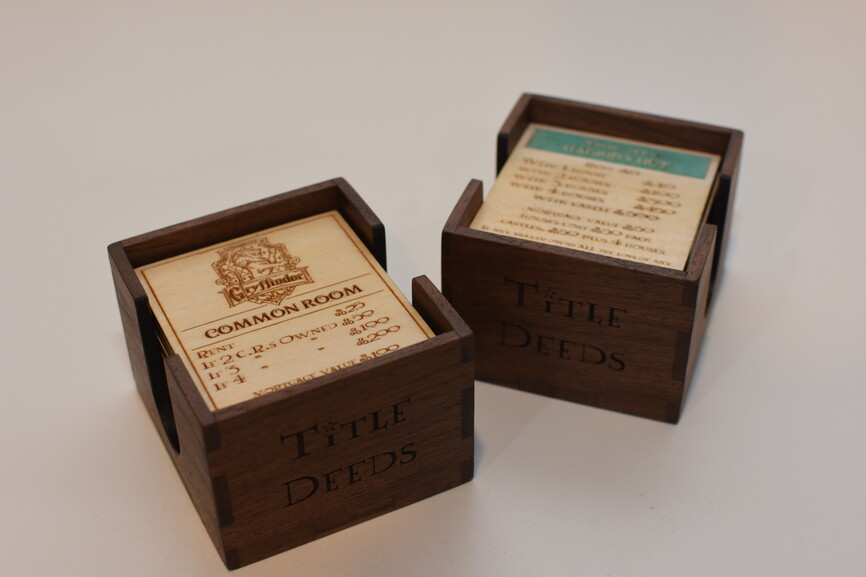
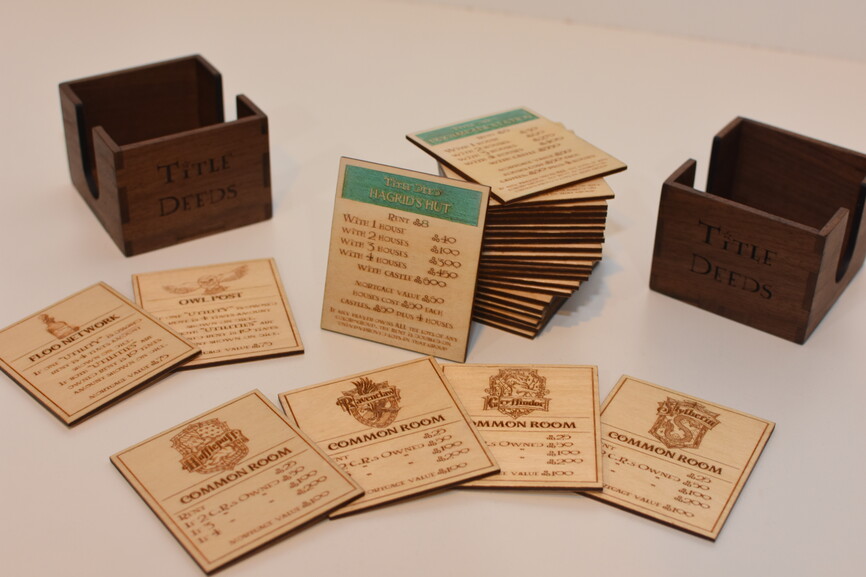
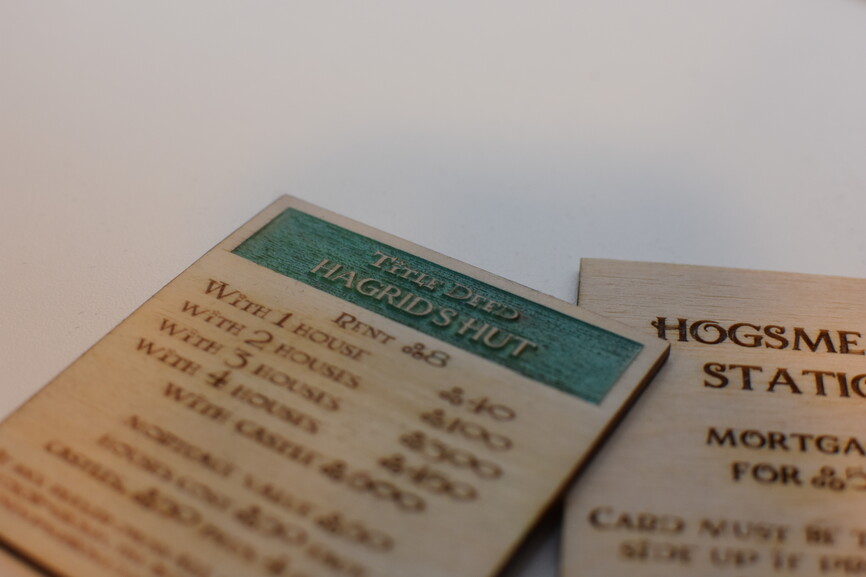
Title Deeds
I really wanted the text for the heading of the cards to be inside the colored portion of the cards. I tried a number of different methods that just didn’t look the way I wanted. I ended up engraving around the text so that it would be raised up and the engraved section painted.
The Title Deed cards were made from Baltic Birch plywood and engraved on both sides (using SD Graphic setting for maple plywood).
Note: I find the easiest way to do this is to have the front and back images overlaid in the same file and setting one of them to ‘Ignore’. Then after the first side is engrave and the shape is cut, I flip them over and set the cut and first image to ignore and engrave the second. I typically use magnets or hold downs (courtesy of eljefe4) to secure the sheet so it doesn’t shift when I’m flipping the pieces over.
I applied three coats of the Water Based Top Coat to both side of the cards. Then I hand painted the engraved heading sections with latex paint. Once the paint dried, I sanded them to remove extra paint from the letters and applied one more coat of the Water Based Top Coat.
Coins and Bank Trays
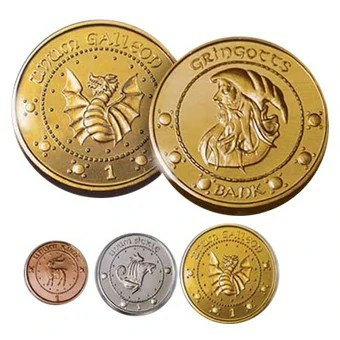
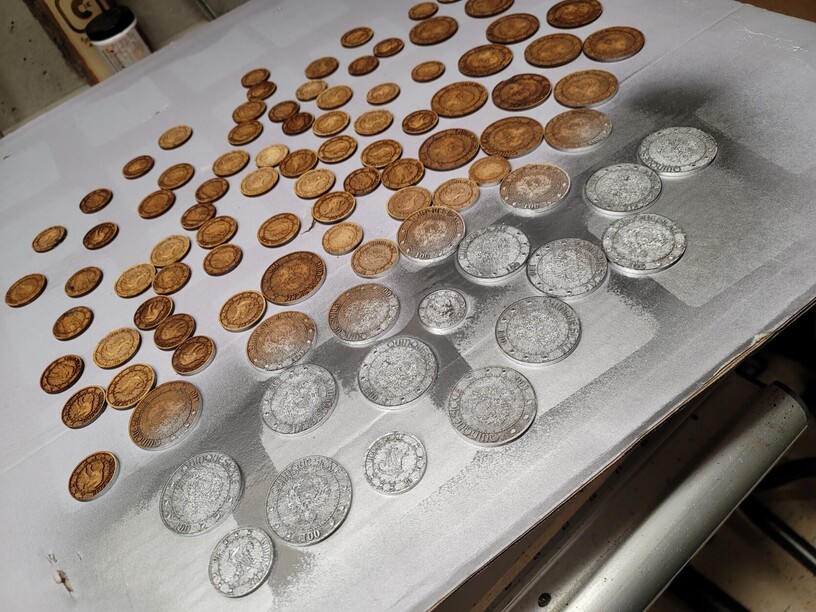
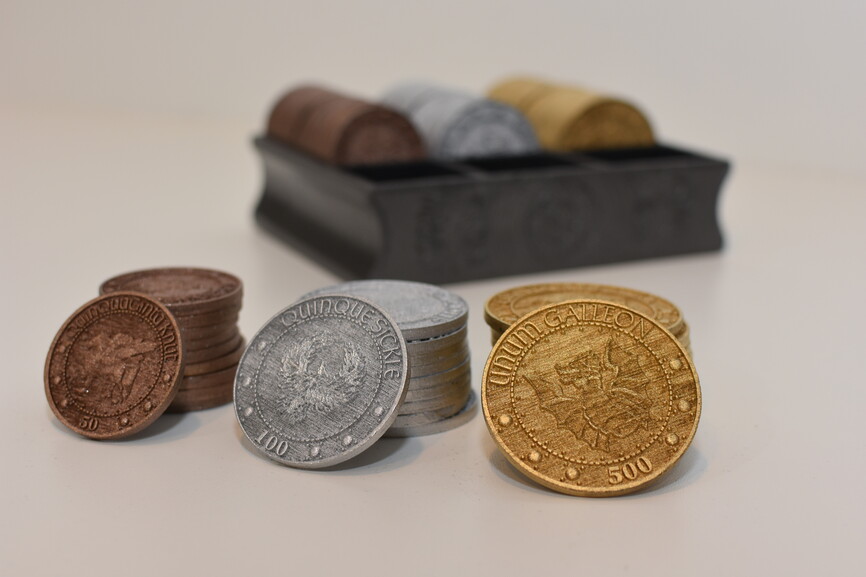
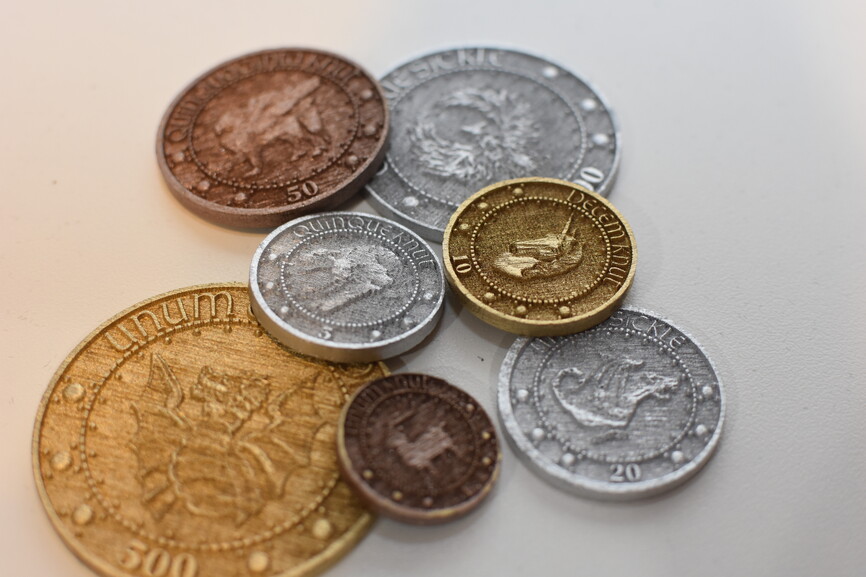
Since wizards don’t use paper money, I of course had to make coins to for the game. In Harry Potter there are three unique coins: Knut, Sickle (equal to 29 Knuts), and Galeon (equal to 17 Sickles or 493 Knuts)- image below. I took some creative liberties and modified the values of the coins for the game: 1 Galeon = 500 Knuts or 25 Sickles, and 1 Sickle = 20 Knuts. The coins in Harry Potter have text “Unum” (which is Latin for one) and the coin name on the top and the value on bottom. To complete the denominations required of the game I created four new coins as multiples of the knut or sickle. For example, the 5 coin is quinque (Latin for 5) knut. I put the value for all coins in the Knut equivalent. It was fun picking creatures for the new coins. It took a lot of experimenting to get the images optimized for engraving.
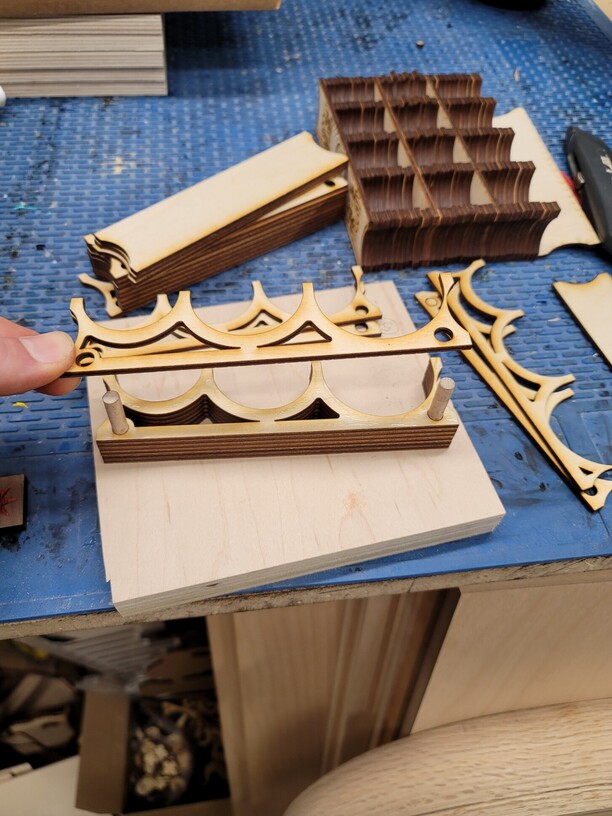
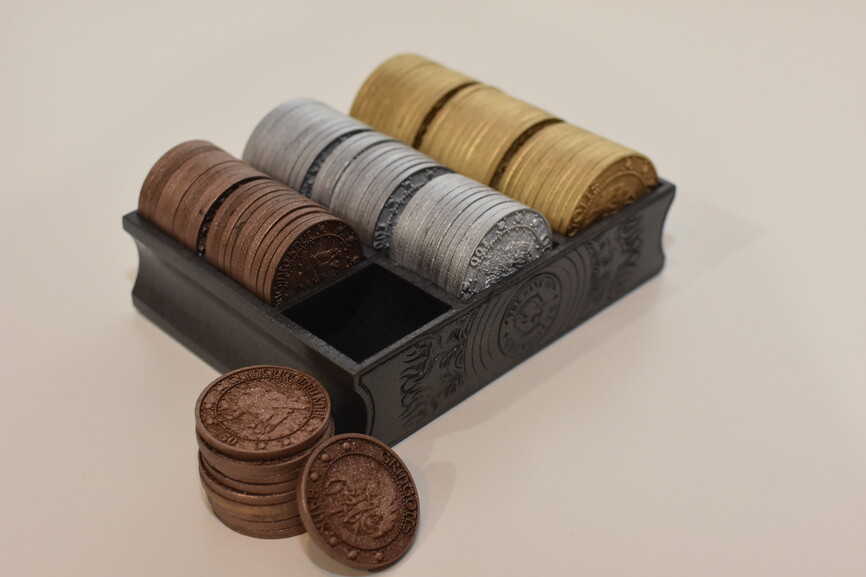
I made 30 of each coin from 1/8 Baltic Birch plywood engraved on both sides (using SD Graphic setting for maple plywood). The coins are double sided, so I used the same method of flipping them as noted above for the Title Deeds. Due to the high level of detail and overall high quantity of coins it took a lot of laser time. I used metallic spray paint to (gold, silver, and hammered bronze) to paint the coins. It took 2-3 coats for each side of the coin. I am still debating if I should faux patina on the coins to make the details pop more. I tried it on a few extra coins, and I like the result but also like the coins looking shinny and new… tough choices. What do you think I should do?
The bank trays were also made from 1/8" Baltic Birch plywood. They are made by gluing multiple layers together. I included 1/4" holes in the pieces and use 1/4" wooden dowels in the holes to help align the pieces while gluing. I then sanded the side smooth and painted using metallic gray hammered finish spray paint. Once the paint was dry I applied black flock to the sections where the coins would sit.
I am really happy with how the coins and bank trays turned out!

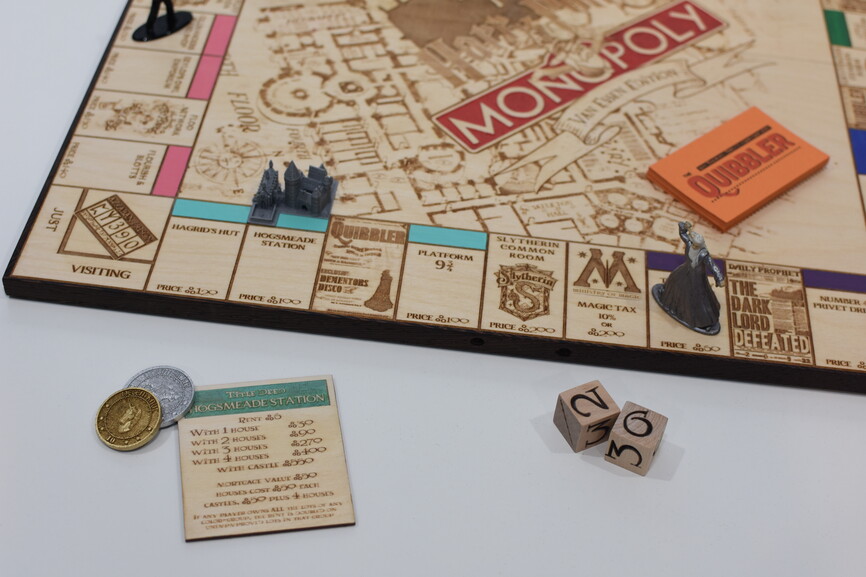
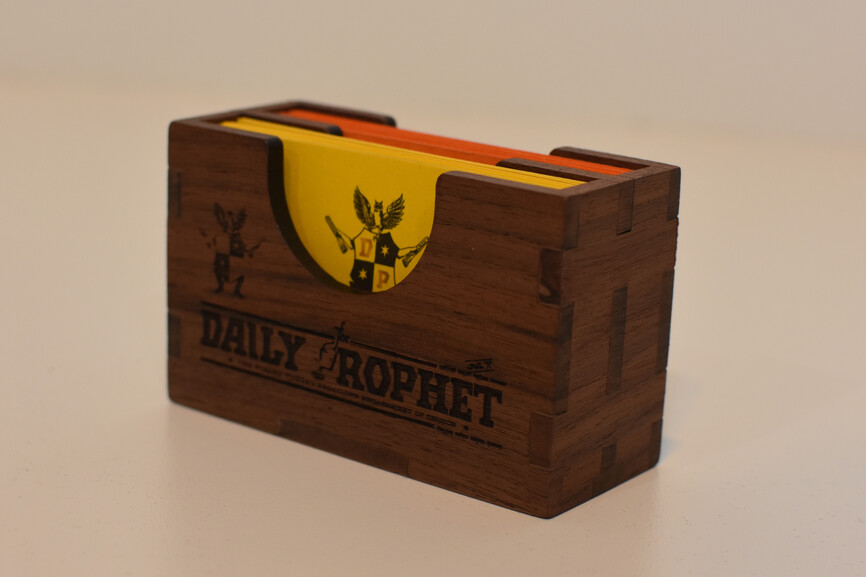
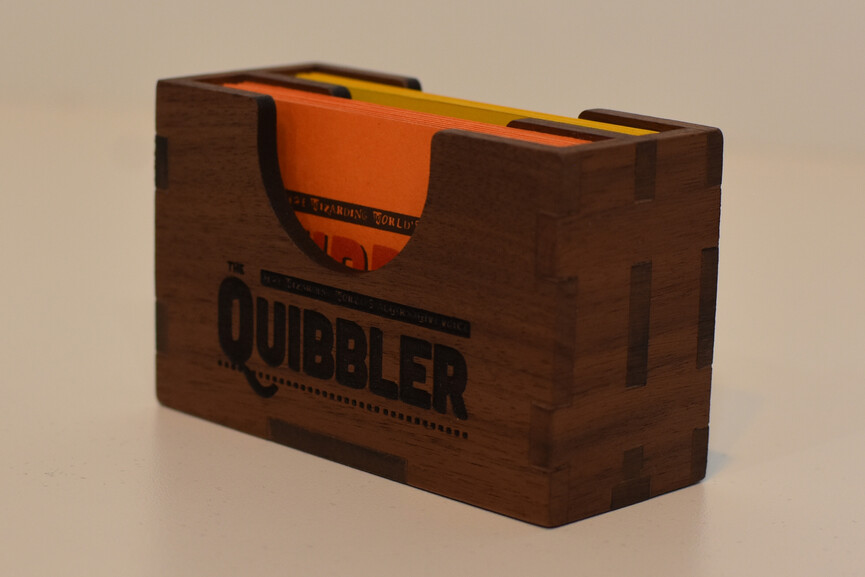
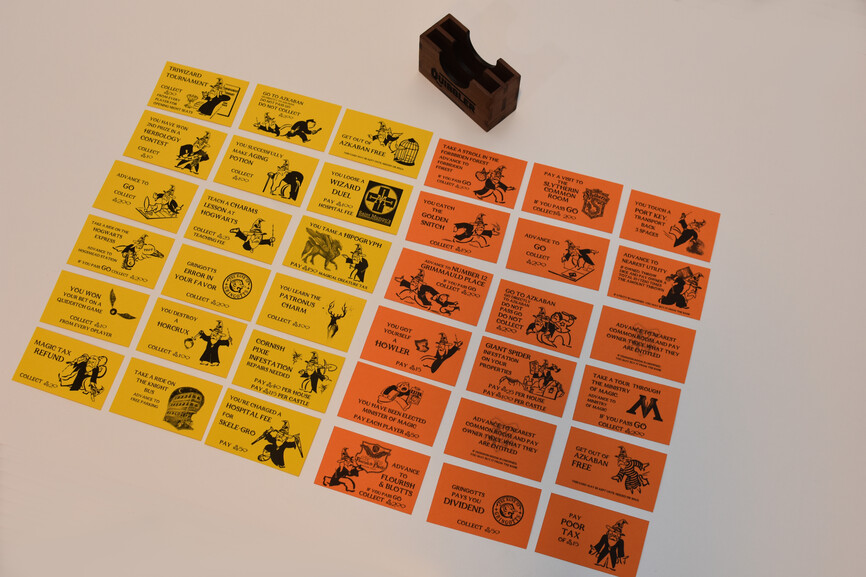
Quibbler (Chance) and Daily Profit (Community Chest) Cards
I had a lot of fun creating a Dumbledore inspired version of Mr. Moneybags for the Chance and Community Chest equivalent cards. I mimicked the image theme of the classic monopoly cards where it made sense and made up a few of my own. I kept the values of the cards the same as the original game. I printed the cards on colored cardstock and then cut them out.
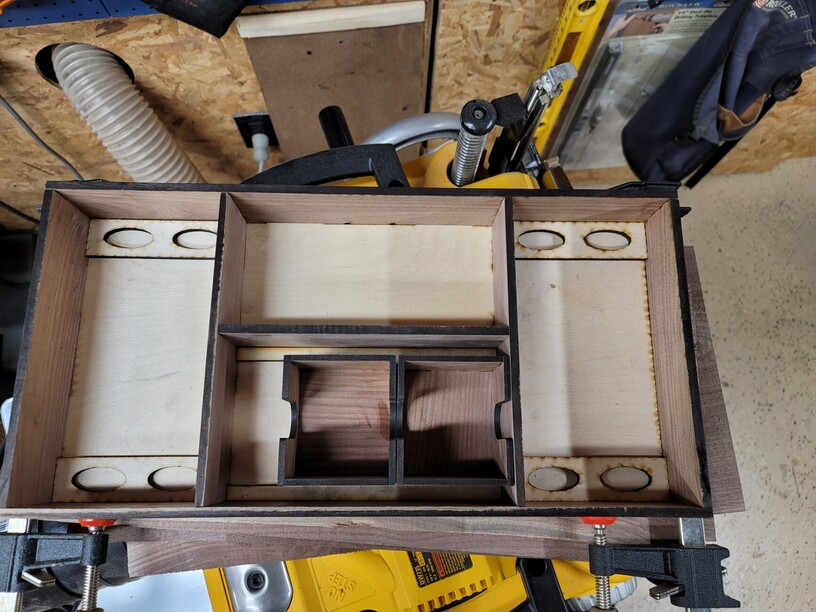
Storage Box
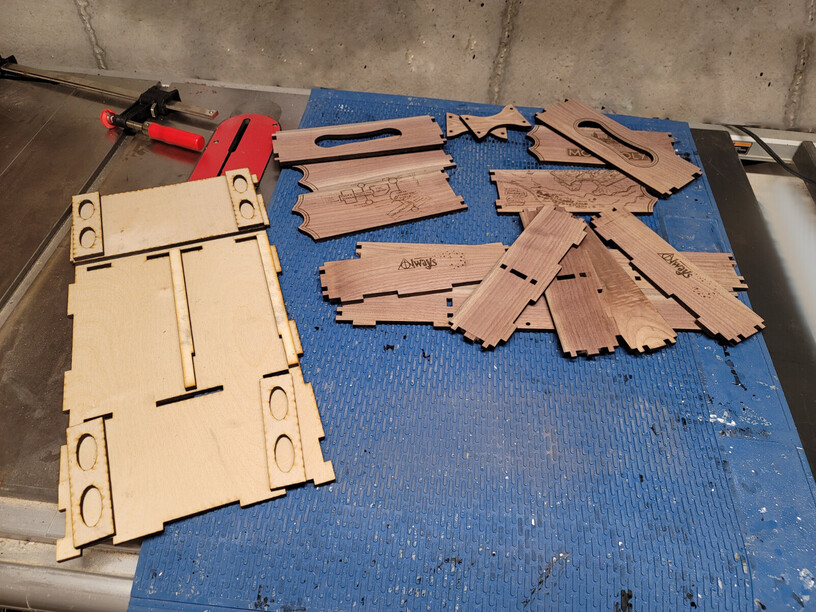
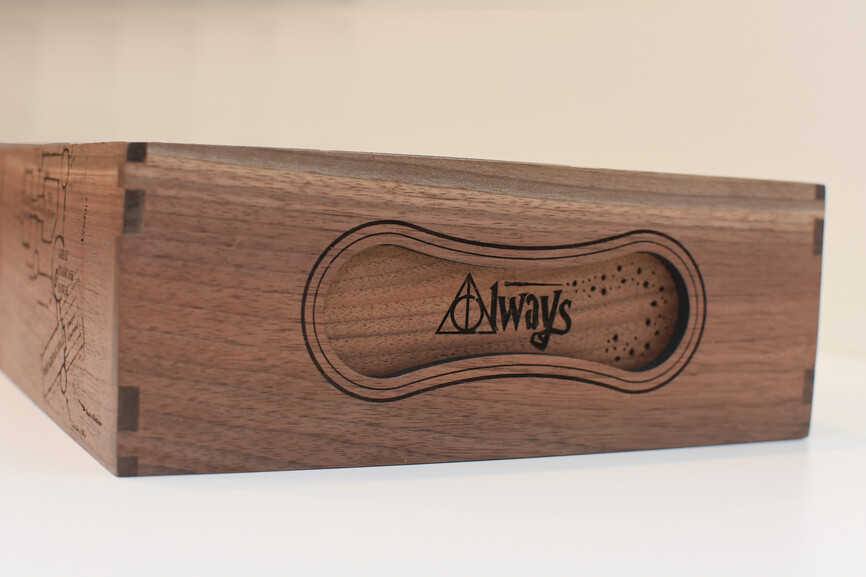
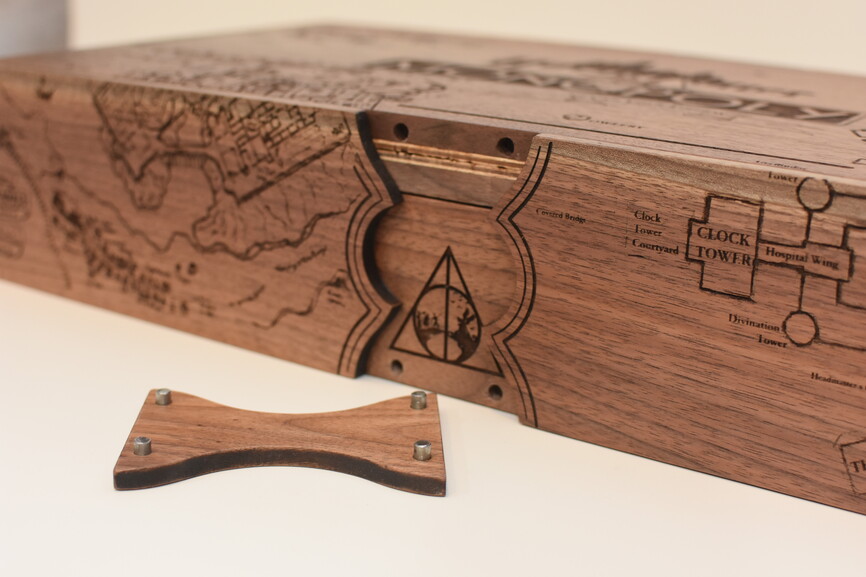
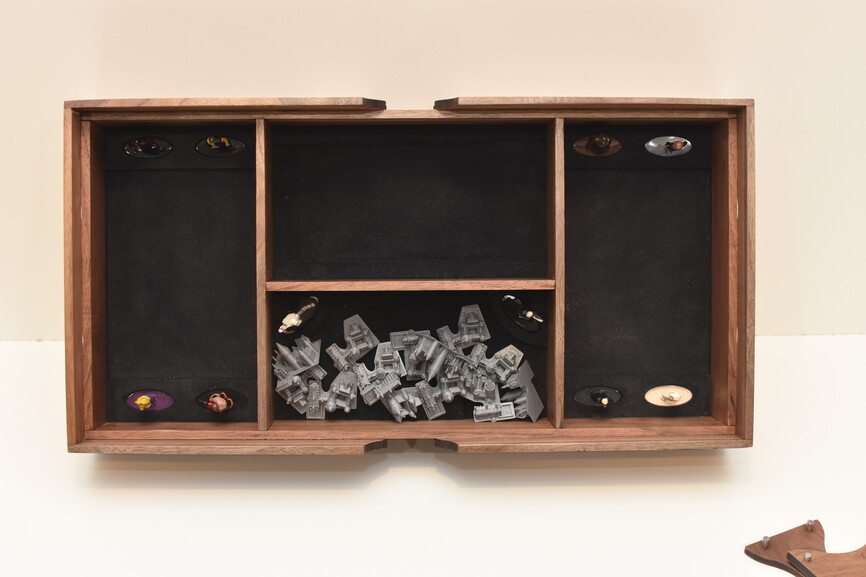
It took me a long time to decide how I wanted to design the storage box. I played with some creative ideas requiring a wand to open, hinges, sliding pieces, and numerous others. In the end I decided to keep it relatively simple (partly due to timeline restrictions). I made the box 0.25" walnut with a 1/4" (0.22" actual) Baltic Birch plywood bottom. The Title Deed and Quibble/Community Chest card holders were made from 3/16" walnut. The Game Board serves as the top of the box and is held in place by two removable pieces that have small pins. Inside the box is divided into 4 sections, two on the side each holding a bank tray and 4 pieces, one in the middle for holding the card boxes, and the other in the middle for houses, hotels, dice, and two pieces. I set the height of the boxes and trays so that the coins and cards would stay in place with the cover on, even if flipped upside down. The layout of the Storage box was a challenge but ended up quite optimized.
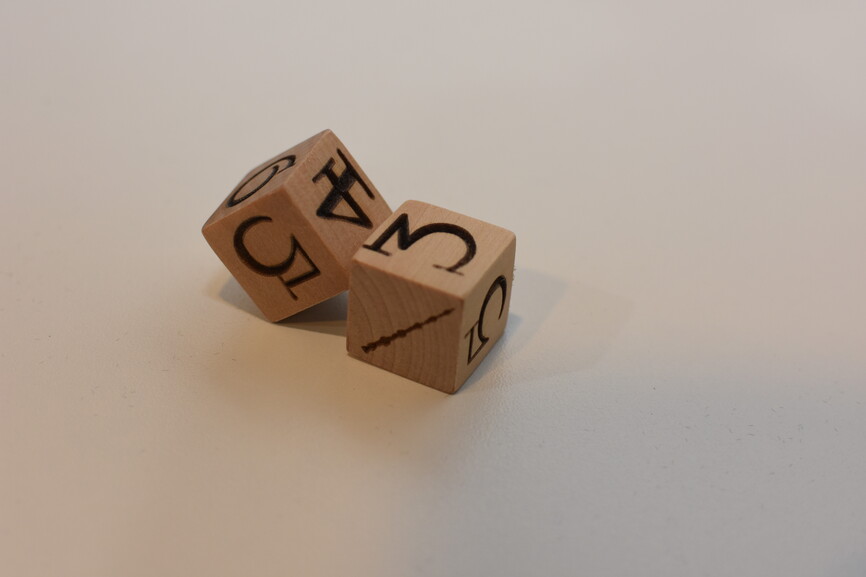
Dice
The dice are made from 3/4" maple cubes (likely available at your local craft store). I wanted to make my own so that the numbers were in the same font as the board and cards for continuity. I sanded the dice after engraving but did not apply any finish.
Note: to get the alignment of the number engraves correct I laser cut a 3/4" square in a piece of cardboard to position the cube for the engrave. My laser file has the numbers and square outline overlaid so I could set all numbers to ‘Ignore’ except the one being engraved and the rotate through them for the different sides of the die without worrying about alignment.
Pieces
I purchased the 1.65" cast character pieces from Amazon. The Castles (hotels) were 3D printed from a file I found on Thingyverse. I have not decided on the design I’m going to use for the houses yet but I’m thinking that I will go with a cottage or brick building.