Glowforge Automatically Adding Stroke?

So, I’m having a slight problem with a few files I’m trying to import into the glowforge app… it looks like, upon render, the app is automatically adding a stroke around fills that have stroke set to “none” width 0… Normally, not an issue, but I have a very detailed file, it makes things blurry…

Here’s an example of one: Narnia Bookmark
I put it together in Affinity Designer, and it looks correct, but the detailed inverted lion engrave just turns into a mess… the thing is, it’s not a limitation of the glowforge itself because if I convert it to a raster image and engrave it, it can totally handle it.

Could someone maybe let me know what I’m doing wrong, or if this is a bug in the import/rendering process of svgs? Thanks!

When I open your SVG in Illustrator, this is what the lion graphic looks like:

lion1

I think what you are wanting is to have the grey area engraved, right? So what I did in Illustrator was to Ungroup, then Release Compound Path. I hid everything but the grey lion fills, selected them all, and changed the color to white (just to make it easier to see). Then I did a Show All (but re-hid the circular outline to get it out of my way). Selected the grey background part and sent it to the back. Selected the whole thing and did a Pathfinder…Minus Front. That gave me this:

lion2

Sorry, I don’t know how to do that in Affinity Designer. Basically, you need to punch the image out of the background. Instead, the GFUI was attempting to score all those outline pieces in the lion design.

2 Likes

Oh man, that’s crazy… it doesn’t look that way at all in Affinity, but that makes sense. Thanks! I’ll see if I can figure out what Affinity is doing strangely… this is what the original looks like to me in Affinity:

Thanks for taking a look at it… If anyone more familiar with Affinity has any idea of what horrible thing I did to make it look correct but export so terribly, suggestions are welcome! I am still very very new to Affinity.

2 Likes

Yes, you need help from an Affinity person for sure. But one thing to keep in mind is that layered designs like the above (white fills layered on a gray fill), are not going to work the way you expect them to. You need to be able to see that background grid through the white pieces.

3 Likes

Wooah… okay, now I understand even less… So I changed the fill mode from “Alternate (Even-Odd)” to “Winding (Non-Zero)” and now I see what you were seeing… But release compound path isn’t even available to me, since Affinity thinks it’s just a single curve. :frowning:

Oh well, more to learn about vectors.

Try the Affinity Designer tutorials in the 2D Vector Design area of Glowforge Tips and Tricks category. I’ll bet it covers your use case.

1 Like

But one thing to keep in mind is that layered designs like the above (white fills layered on a gray fill), are not going to work the way you expect them to. You need to be able to see that background grid through the white pieces.

Oh, yeah for sure. It’s not super clear in the screenshot I posted, but in Affinity that isn’t a white fill on top of a grey fill… Affinity thinks it’s empty based on the Even-odd fill mode (the default in Affinity). It’s only when I switch to the winding fill mode that it thinks the whole thing is filled in like in the screenshot you posted.

Using the original file here’s what I see (with red rectangle beneath the design for clarity):
Alternate (Even-Odd) :


Winding (Non-Zero) :

I’ll check out the tutorials you posted, and thanks for the help!

Oh yeah, that is pretty strange and outside my level of expertise.

1 Like

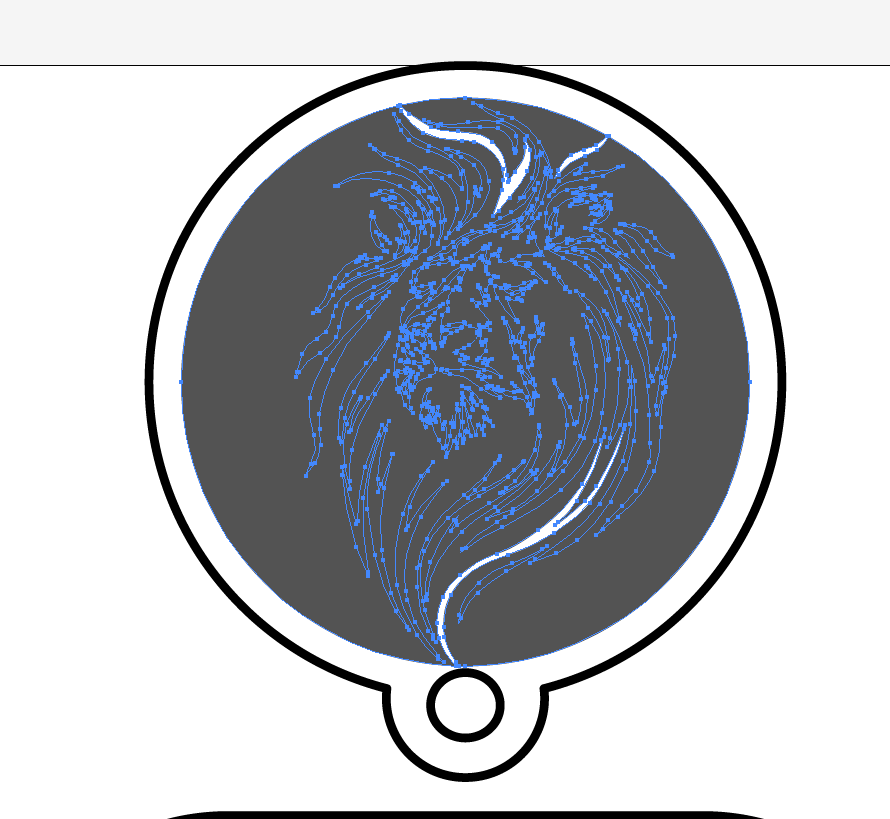
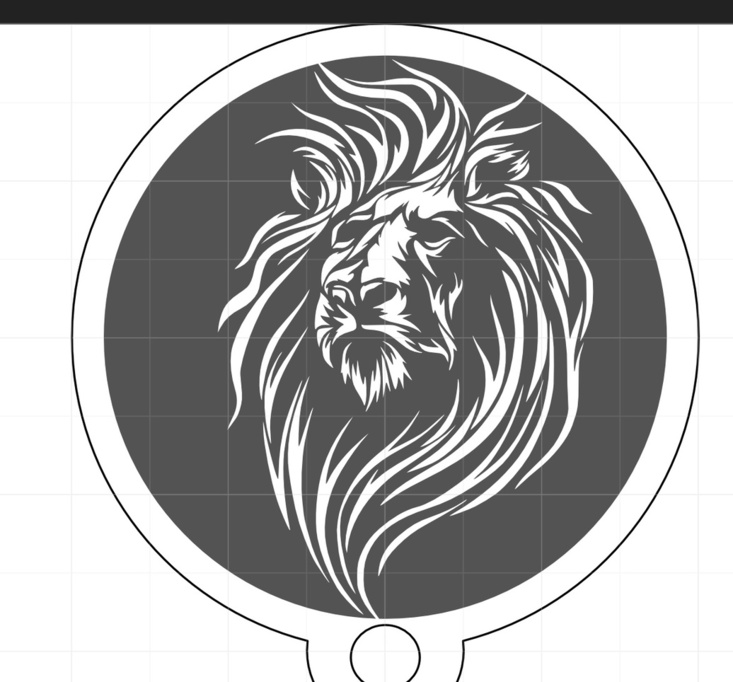
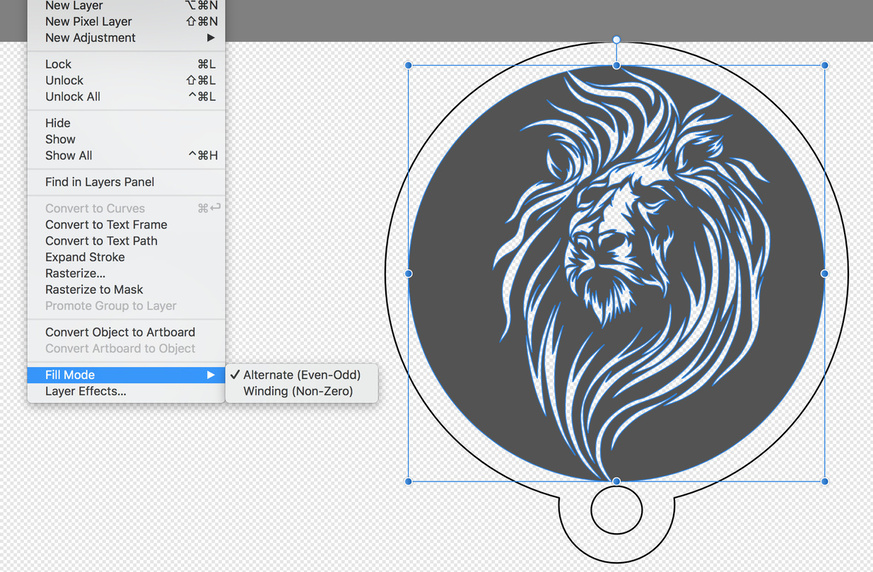
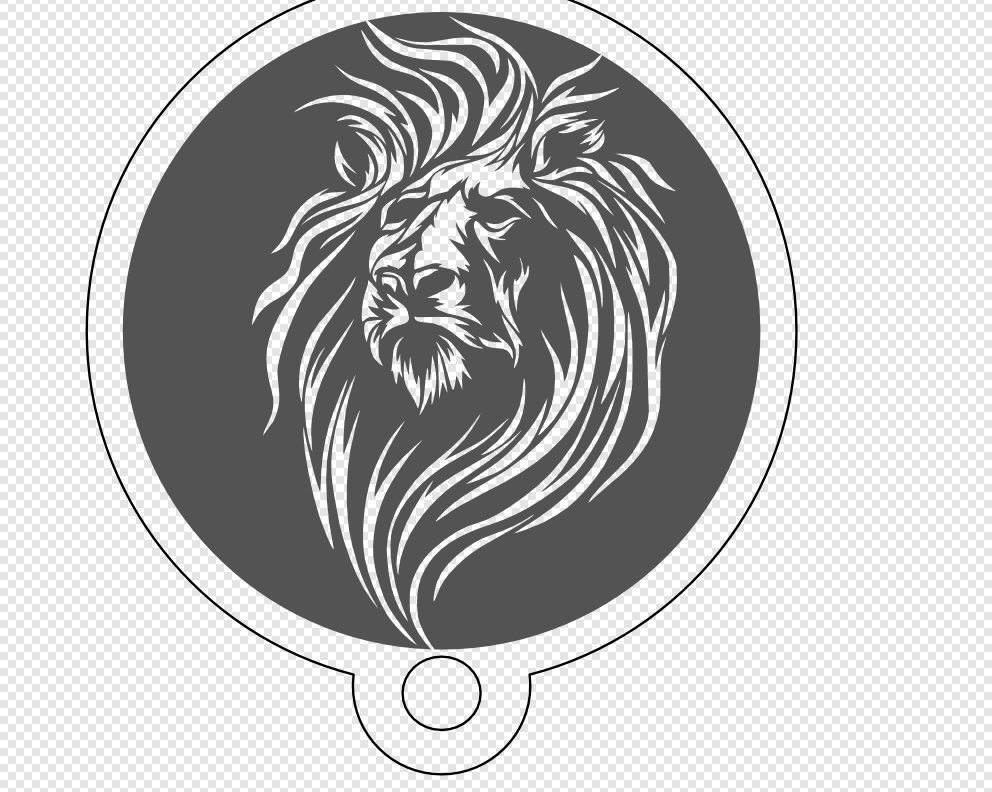
It’s a question of fill rules. In that file it’s set to use the even-odd winding rule, but I think the Glowforge always uses the non-zero rule. I’ve run into this a few times, but I never got around to making a good example to send to support.

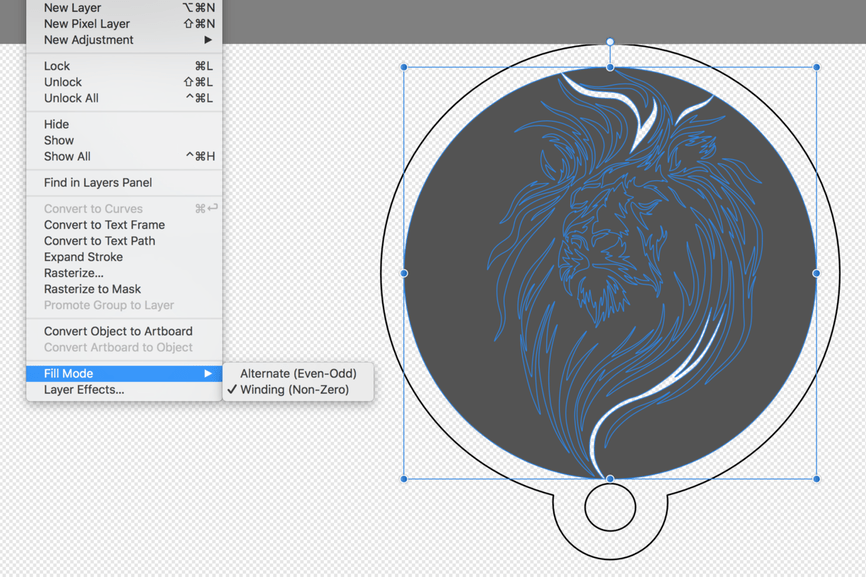
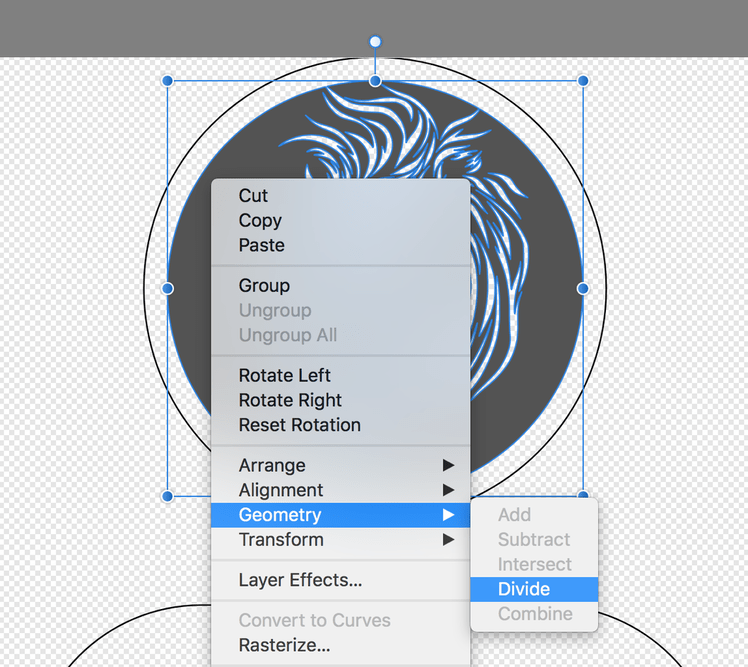
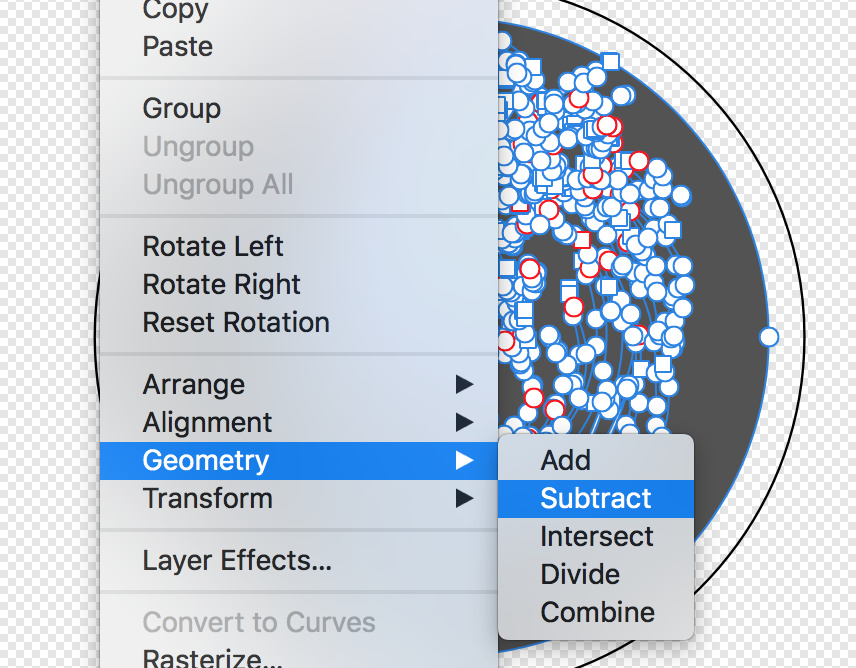
If I toggle the fill rule in Affinity Designer you can see it switch to show it the same way the Glowforge does:

If you look at the actual SVG file, Affinity Designer is setting a default fill-rule in the style on the <svg> element:

<svg xmlns="http://www.w3.org/2000/svg" xmlns:xlink="http://www.w3.org/1999/xlink" xmlns:serif="http://www.serif.com/" width="100%" height="100%" viewBox="0 0 6000 3600" version="1.1" xml:space="preserve" style="fill-rule:evenodd;clip-rule:evenodd;stroke-linecap:round;stroke-linejoin:round;stroke-miterlimit:1.5;">

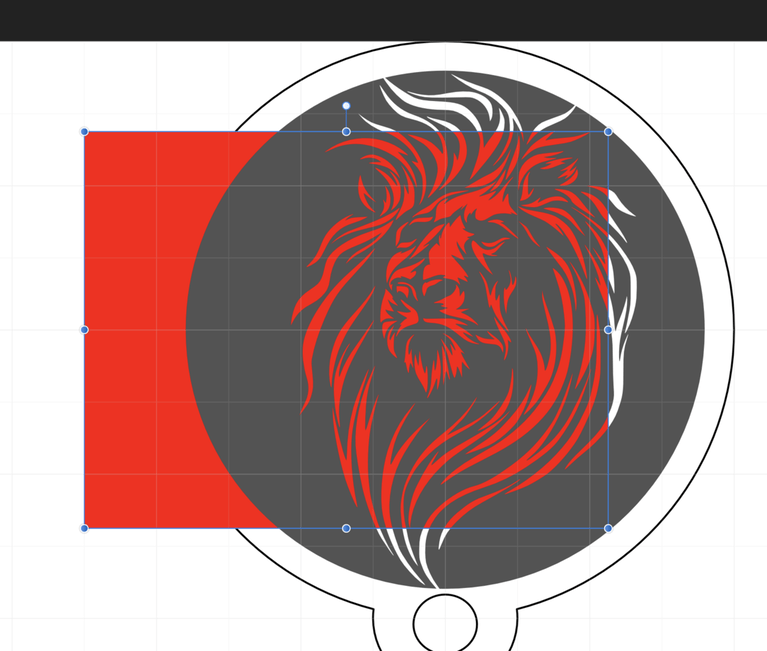
Some of the other paths in the file use the nonzero rule, so those explicitly set the style on the <path> element to override the style from the root <svg> element:

<path d="M644.083,590.93C643.917,591.041 643.667,591.097 643.333,591.097C643,591.097 … path data clipped for brevity … 655,590.652 654.833,590.93Z" style="fill-rule:nonzero;"/>

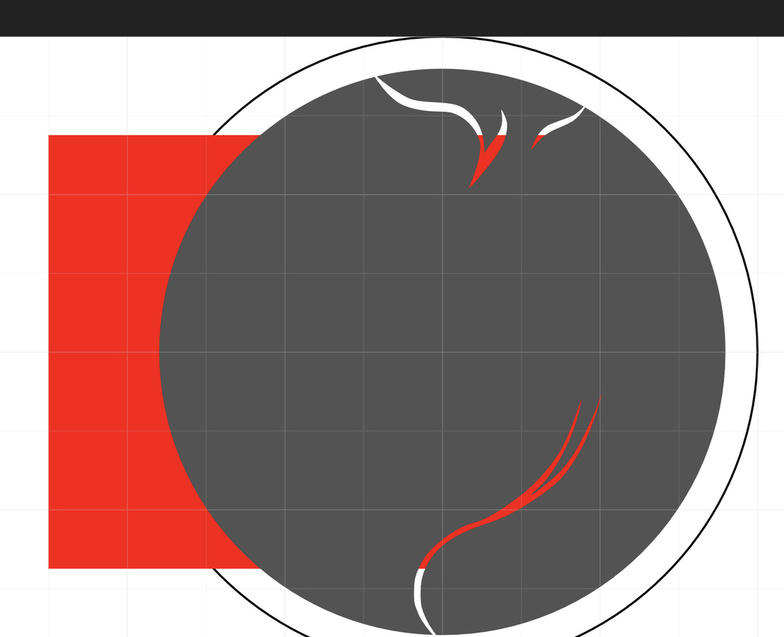
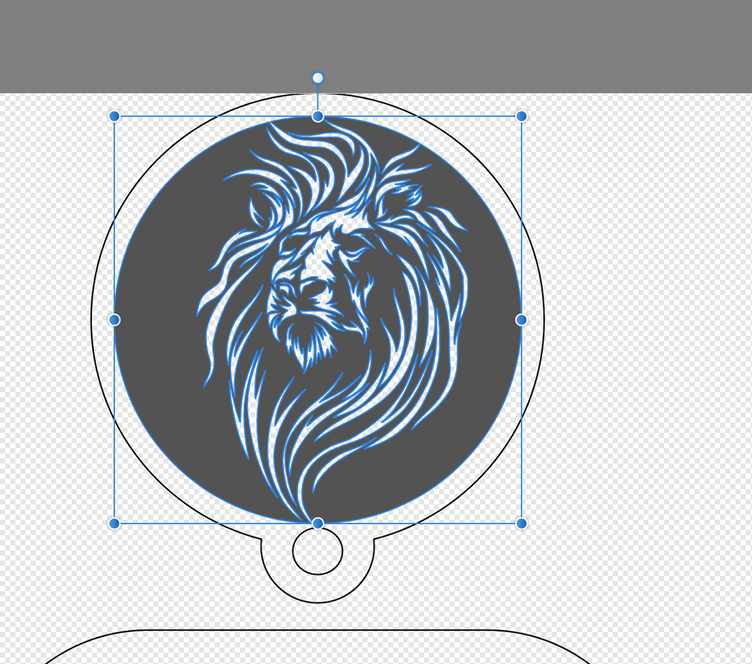
Whereas the path in question doesn’t set the fill-rule explicitly so it should be using the fill-rule inherited from the root <svg> element.

As far as I can tell the Glowforge completely ignores the “fill-rule” setting and always applies the nonzero winding rule. I tried modifying the <path> to set it explicitly and the Glowforge still ignored it. I’m sending a test file to support.

8 Likes

Oh, and I just figured out why I run into this so often. When you use the Geometry->Subtract operation in AD, the resulting path always seems to use the even-odd rule. Given that’s the normal way to “punch out” one path from another shape, it comes up a lot.

GF very much needs to support both fill rules!

Here’s a “fixed” version of the file made in Affinity Designer:

fixed-narnia-bookmark

And here’s how it looks in the GFUI:


I fixed it by reversing a bunch of the paths so that the non-zero rule produces the right results. Here’s what I did:

  1. Select the path:

  2. Geometry->Divide

  3. Deselect the curve representing the background shape:

  4. Choose the Node tool and then click on Reverse Curves:
    reverse

  5. Add the background curve back to the selection:

  6. Geometry->Subtract

  7. Set fill mode to non-zero just to check that it looks ok using that rule (because Glowforge uses it no matter what):

  8. Looks good!

17 Likes

Now that’s expertise!

5 Likes

This whole thing is way over my head and the discussion may be well beyond the info in this linked post, but thought I’d share it just in case. (The first half of the thread was us just trying to figure out what was going on lol.)

Beautiful file BTW!

2 Likes

Wow, thank you so much for the info! Just knowing that glowforge always uses the non-zero fill mode will make it easier to double check images before uploading.

Thank you all for your comments and help, it’s awesome having a community like this to help troubleshoot! You’re all amazing.

4 Likes

I cannot begin to express how much I agree!! Thank you @cynd11, @tim1724 and @kittski!