Glowforge seems to be losing power

Thanks for the advice.

I’m very familiar with cleaning the Glowforge and because of the loss of power I clean it every time I use it so that dirty optics wont contribute.

I have not cleaned the exhaust fan but I will do that. There does not seem to be any issue with exhaust as I can see the fumes sucked out very rapidly. But to be sure I’ll clean the exhaust.

Okay forgive me for asking but it does need to be clarified since some of these are very easy to overlook and some folks have not seen the new guidelines that Glowforge has added recently…

Have you cleaned the…

  • Lid Camera?
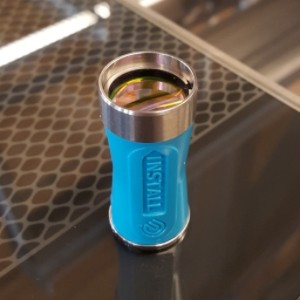
  • The lens inside the head? (It requires removal with the blue magnetic tool, and needs to be reinserted in the correct orientation.)
  • The two small round windows underneath the head?
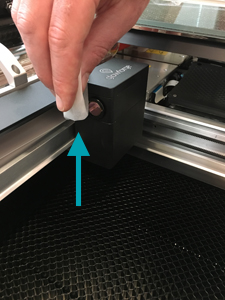
  • The round window on the left side of the head?
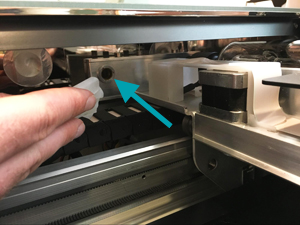
  • The round window hidden underneath the left side of the machine, opposite the laser arm?
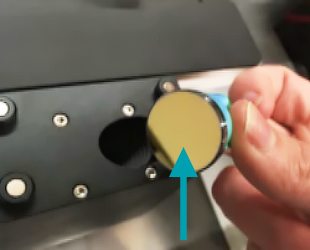
  • The mirror?

There are pictures of what to wipe here in the Support section:

They shouldn’t require cleaning before every print. But missing one can cause what you’re describing. So checking to make sure that you caught them all is worth the time.

While you are checking, if you see any scratches or damage, take a picture and let support know, or post them here.

They will need to see them so they can tell you what comes next. :slightly_smiling_face:

Ya know? It’s been a couple of years now and I still forget to clean those most of the time.

1 Like

Me 2! :smile:

Oh, another thing to check is the airflow into the unit on the right side–make sure there’s nothing blocking that or a piece of paper stuck up on the underside–something else I’ve learned to check for frequently!

As others noted, you shouldn’t need to clean before every use, but when you do clean, make sure you get everything…

Also consider the ambient light–e.g. close to a window that gets lots of sunlight? Though most often that affects trying to center/focus, bright light may affect more–e.g. summer worse than winter months? I recall I had a “loss” of power after a while–I started using my unit in Nov 17, have it next to a south facing window–and seems it was spring when did notice “loss of power”–but now in the habit of closing the curtain if it’s not fully overcast day, and the laser power has been consistent… May be pure coincidence, but it eliminated a variable from the environment!

1 Like

Hi @sarjanlong, I am so sorry you are having issues cutting through Proofgrade Material! Thank you for taking the time to do some initial troubleshooting. Can I have you check a few more things as well?

Please send photos of all your cleaned optical components, with special attention to any damage you might find:

  • Both windows
    • The printer head window, on the left hand side of the printer head
    • The laser window on the inside left of the Glowforge
  • The printer head lens
    • Both sides of the lens, top and bottom
  • The 45 degree mirror inside the printer head
  • The bottom of the printer head

Once we have those pictures, we’ll follow up with next steps.

Thanks!
2 Likes

Hi Jules,

Thanks for checking on the details. Yes. I have cleaned all of those. This machine has never cut all the way through proofgrade. But the advice I always got was to reduce the speed by 10%. That was enough until recently. The last cuts I did were ridiculous. Even 2 passes at reduced speed didn’t make it through.

I see a message from support so I will follow their guidance now and see where that goes.

The Glowforge is near a small window, however the latest cuts I worked on were in the evening so no extraneous light. I’ll check the airflow this evening when I’m home.

Thanks,

Kathan,

Thanks for the reply. I’ll clean everything and post pictures of all the optics.

@sarjanlong, make sure that your materials are flat, flat, flat. Use magnets or pins to make sure that Proofgrade is not buckled. Even a small warp will mess up a cut.

You probably know that… but it can’t hurt to mention it.

If your machine has never been able to cut through nice, flat Proofgrade on the stock settings, you may have a warranty issue.

Fingers crossed for you.

Is the lens inserted correctly? If it was doing okay until a recent cleaning the lens might have been inserted upside down. That will keep it from cutting through, and it happens a lot more than you’d think.

1 Like

Here are the pictures.

I did a cleaning of all the optics and then pulled the tray out and cleaned the bed and dimples. Then checked the exhaust fan which really didn’t have a lot of gunk in it. No obstructions to the air intake.

Then I put in a sheet of Medium Draftboard (full sheet held down with T-Pins) and ran the Gift of Good Measure print with everything set to default. The print did not come close to cutting through. Not even a hint of it. Time of print about 7pm EST on 9/5/2019.

What else do I need to provide? I also have a video of the cut in progress and the finished product. I can upload those to dropbox if you would like them.

I always use the T pins to hold materials flat.

The lens is inserted according to the instructions on the troubleshooting page.

What’s that ring on the bed in your 3rd picture?

The magnet from the lens removal tool. it comes off the plastic easily.

Do you still have it in the tool? It didn’t end up in the head did it? (BTW, a drop or two of super glue will hold it on)

I am careful to replace it on the tool when I’m done cleaning the lens. I should put some super glue on it but it hasn’t been that much of an annoyance.

I had one drop - they’re surprisingly brittle.

But that’s digressing. Can you load it up and check to see if after it recognizes the PG that it’s got it right? Wouldn’t think they have the wrong sticker but…

Also, do you hear the lens clicking in the head as it focuses? Does the bed image get better if you use the Set Focus tool?

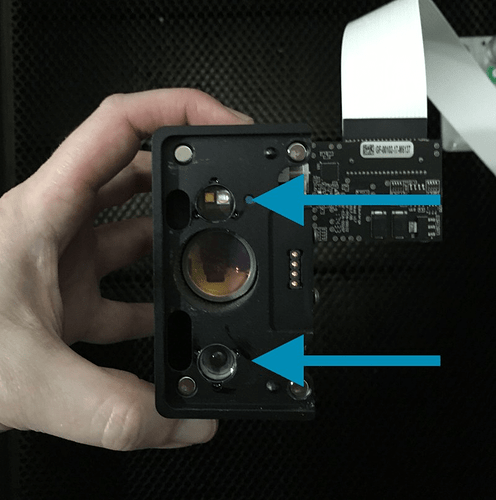
Looks like you’re missing a lens cover for the red dot :red_circle: beam (I think that’s the red dot). While that shouldn’t be a problem, I imagine the cover helps keep things in there clean.

Can you post a picture of what your test cut looks like? If you push print, and go look at the machine when it scans (have to be fast), do you see the red dot hitting the material?