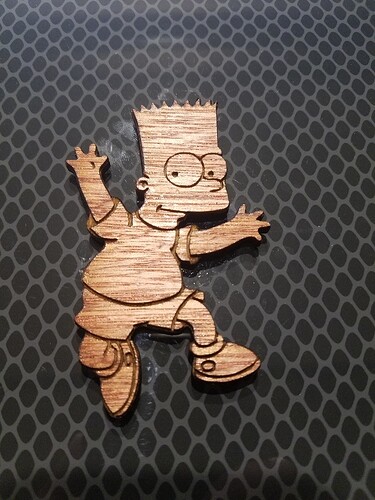
A question came up in another tutorial about how to add a cutting outline to an image that you want to engrave in Adobe Illustrator.
There are several ways to do it. Some of them would involve using another program like Photoshop or GIMP, and those might be a little easier for beginners, but rather than having to bring yet another program into the mix, I thought I’d show how it can be done in Illustrator.
Creating a Shaped Cut Line in Illustrator:
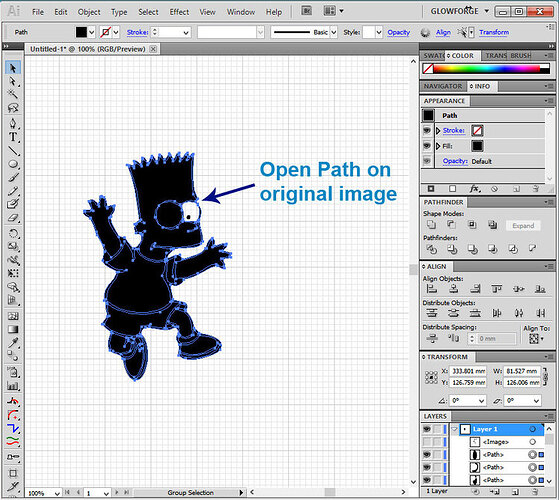
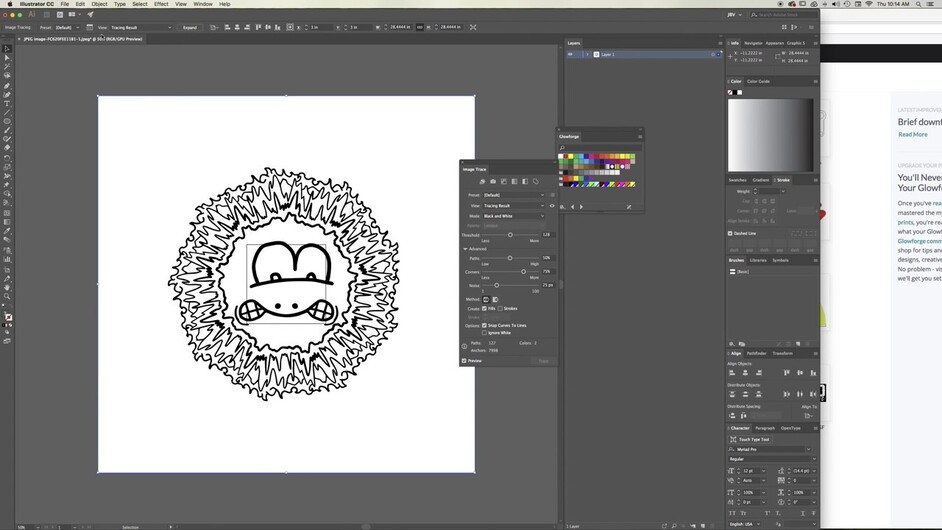
0. Look closely at your jpeg image for problems. This one has a spot near one eye that will result in an open path once the trace is performed. I’m going to show you how to fix that with Illustrator, but the easiest way is to take it into a raster based drawing program and draw in a few dark pixels to close that gap. You want a completely closed exterior for the trace to pick up.
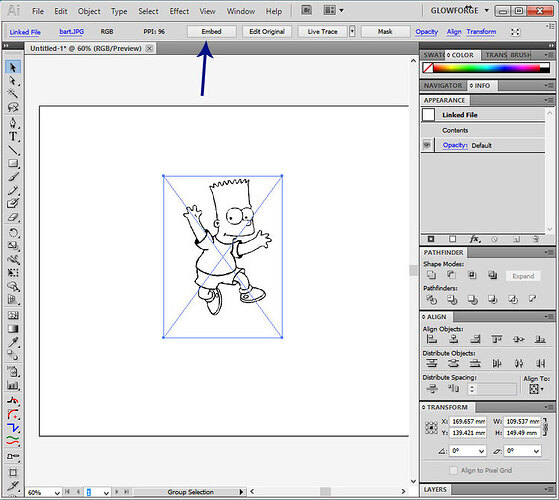
1. Open a new file and drag your jpeg or png file onto the artboard.
Embed the Image by selecting it and clicking the Embed button on the top row.
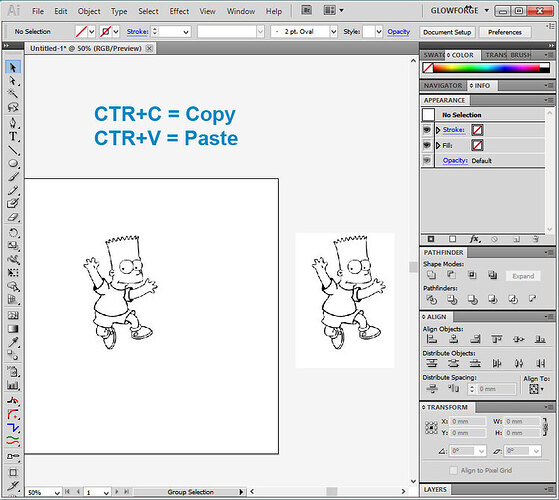
2. Select the image and make a copy of it. Then either hide the copy (by clicking on the eye in the Layers panel) or drag it off to the side out of the way.
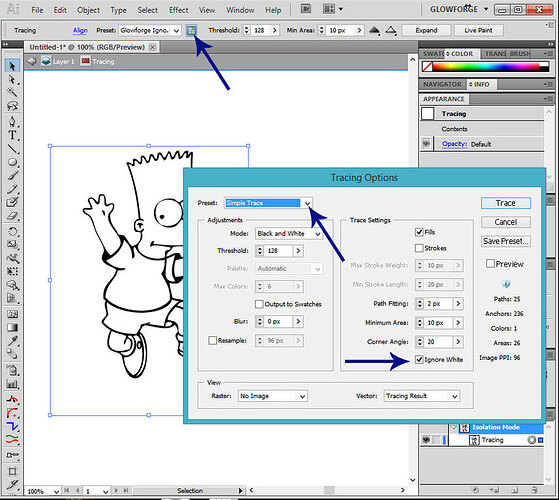
3. Select the image and do a Simple Trace. Make sure the Ignore White Box is selected in the Advanced settings.
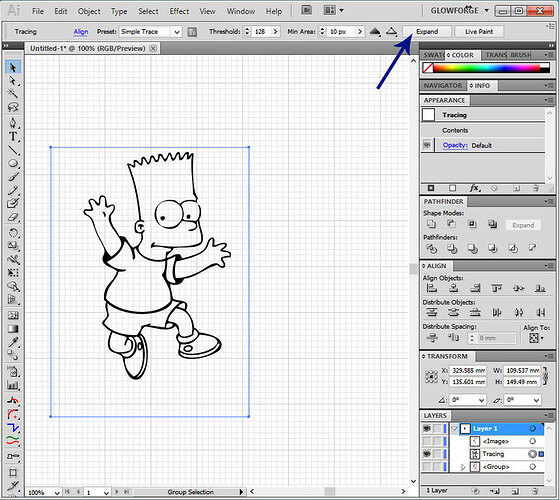
4. Once you like the way it looks, Expand the results.
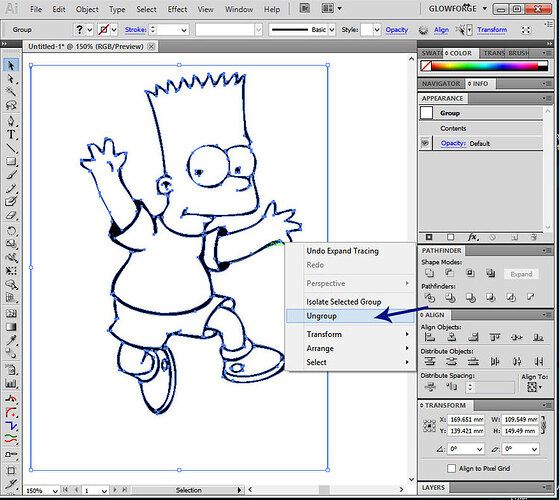
5. Right click and Ungroup.
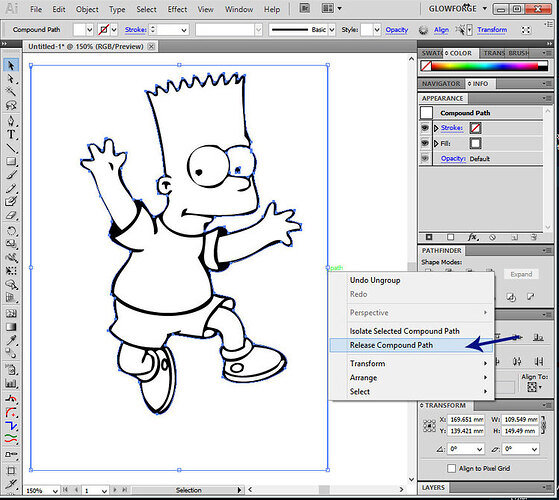
6. Select it again, right click and Release Compound Path
7. Don’t freak out! (It’s supposed to look this way.) What you are seeing is the filled shapes that make up the trace. But they are not connected yet. You have to join them into one complete unit in order to create a single cut line around the outside.
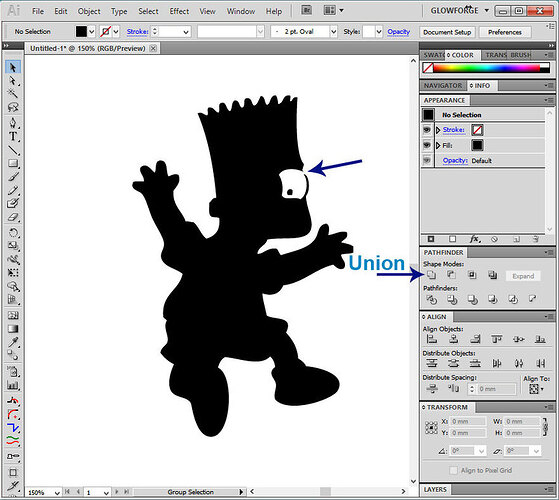
You can also see the effect of that open exterior path on the shape that was traced. It traced right around the opening and hollowed out the eye.
8. Select everything and click on Union in the Pathfinder Palette to join the existing shapes.
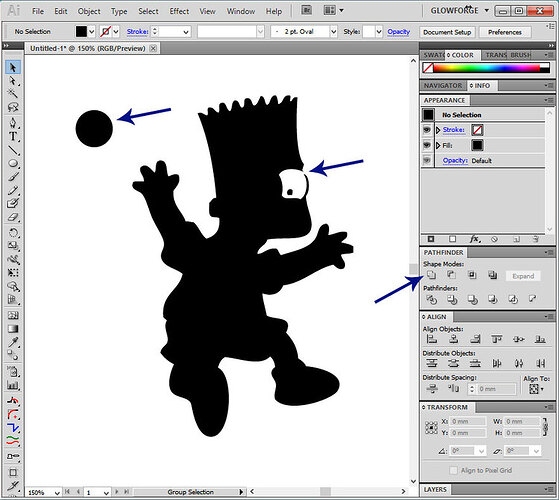
9. To fix the problem with the open path at the eye, I will usually just create a small filled shape, drag it over the edges, and do another Union to join it to the rest of the shape.
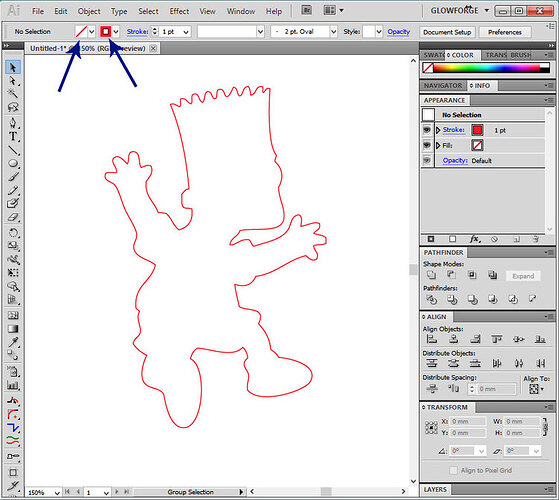
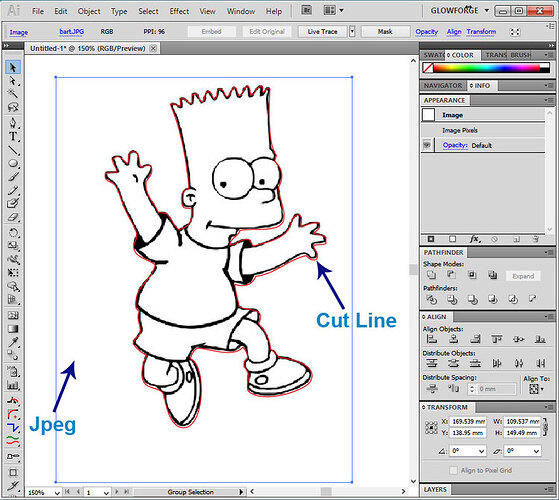
10. Select the shape, give it a Stroke color, and turn off the Fill color.
11. Last step is to align the stroke over the copy of the bitmap image that you created earlier.
- Save the File as an SVG, making sure the Embed Images radio dial is selected.
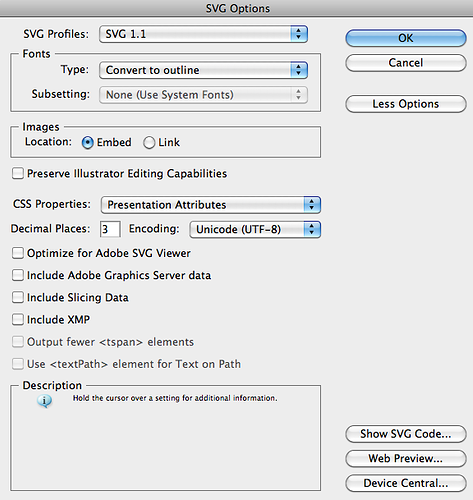
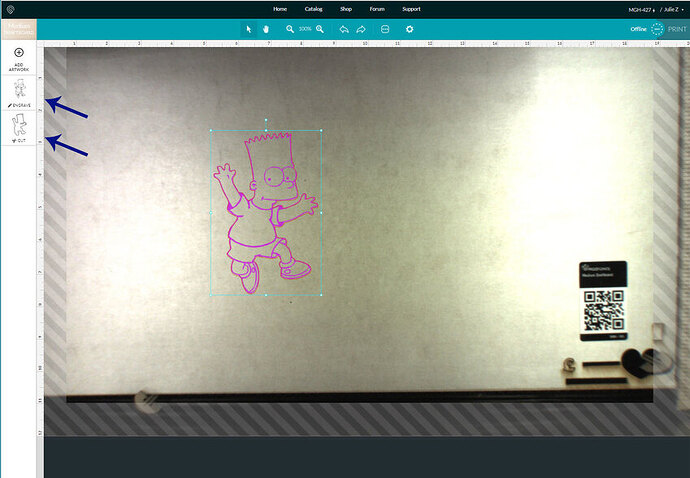
That’s it! When you drag the SVG file onto the dashboard, it will open up with both a cut line and the engraving set up for you.
By the way, if you prefer learning by video, @jbv demos the technique here:
And if you want to use Photoshop to create your outline, @jbmanning5 has a writeup here:
 <— they need to be real.


