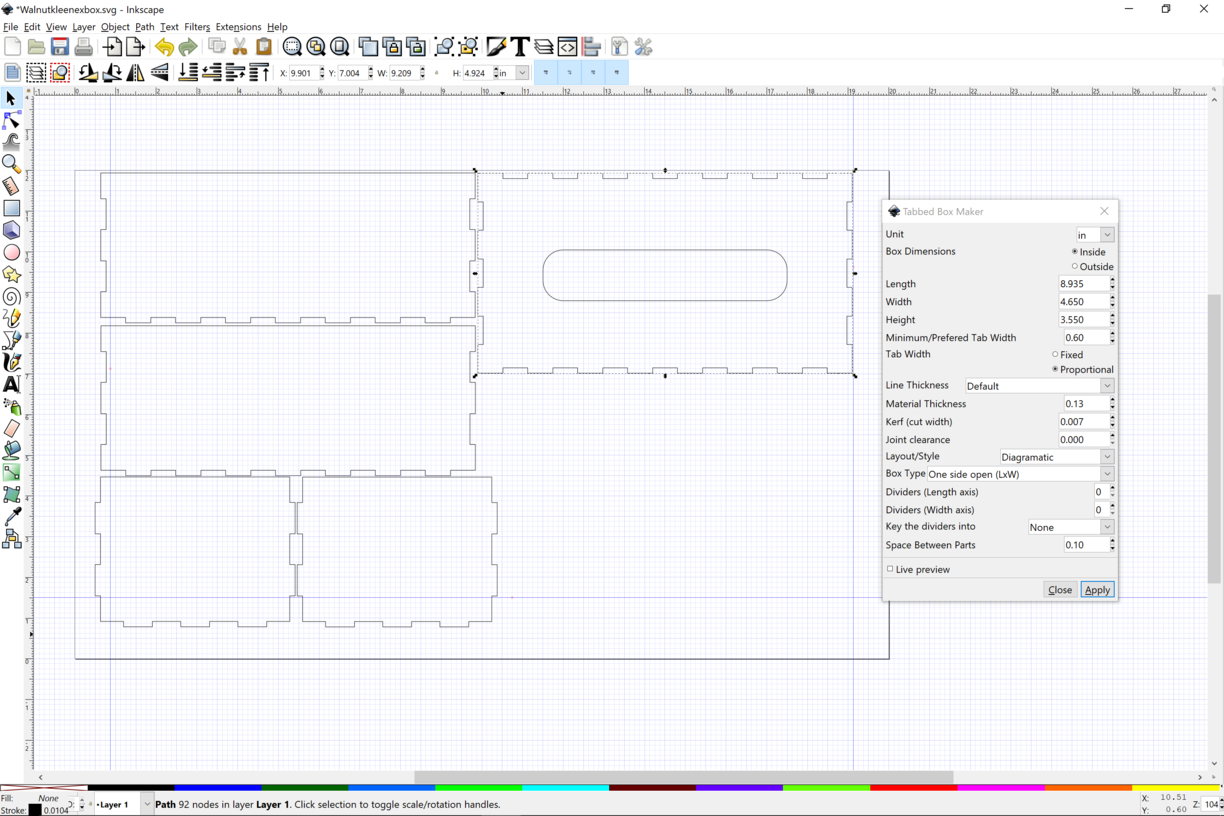
Starting this topic with the goal to investigate Inkscape’s tabbed box maker extension in Laser Tools. To provide some defaults for Proofgrade in using the extension regarding kerf and material thickness.
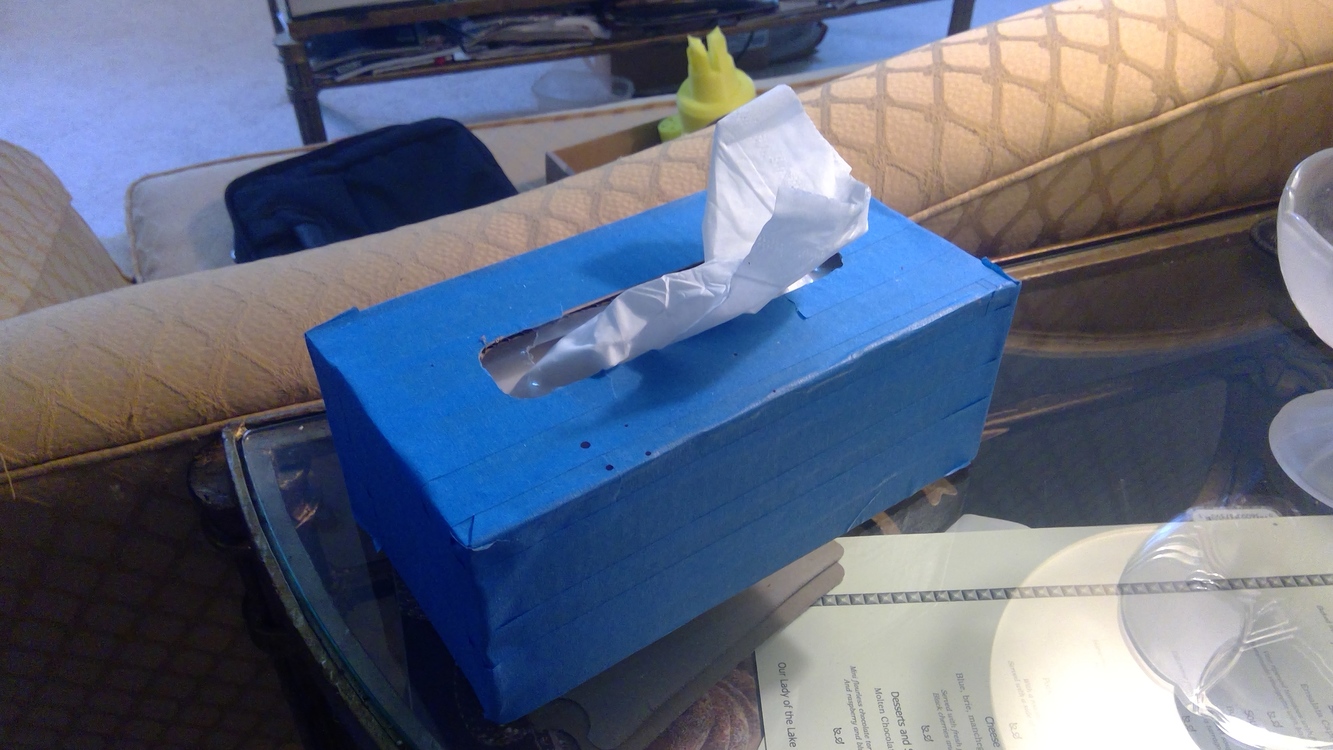
This is a handy design to have at the ready. I’m still tweaking for Proofgrade plywood and will post in a bit, but at the moment it works fine for .15" standard corrugated cardboard. I use blue masking tape to cover the cardboard. Creates a nice and light box cover.
Normally I’m not one to put covers on things just because you can. Like toilet paper garages that sit over the tank or the silos built from coffee cans. They do have a purpose though in protecting the tissue or paper from damp, dust and general damage from abuse. Where I like them is for the car or for the workshop where tissues in their native skins can get mangled pretty fastf, especially as the box gets emptied. I need to find some cheap decorator contact paper to skin it. That would make a festive, bespoke box fairly cheap.
An 19 x 11.5 sheet of cardboard yields one box cover with leftovers. I’m open to suggestions regarding efficient nesting, but this is what I have found that allows for least waste while getting the whole design cut in one go.
Note that these are the inside dimensions of the cover but are the outside dimensions of the tissue box with minimal tolerance built in to keep it snug.
Now the next step is to add some flair and design to a Proofgrade version.
There have been a few designs posted about tissue box covers.
The nesting soft ware works great for some cases. I loaded the Kleenex box with a bounding box of 19 x 11.5. 45 minutes later, after 5000 iterations, it has only succeeded in placing two parts and I can predict that it won’t be most efficient as I need the waste area to be. Rather than a long wide strip at the bottom, I would rather have larger, closer to square areas. I have loads of 2" x whatever scrap. Very little 6x6 scrap.
Depending on your forge’s bed limits, you might want to flip the design so it consumes more of the left side of the board. My PRU has an inch & quarter (plus another qtr to make sure the design doesn’t fall off the edge) on the left but the right side is only about a half inch of no-go zone. So if I push stuff to the right, I get more good scrap on the left side than if I do it the other way where I start the design on the left.
I usually place material 1/4 inch from left and 1/4 inch bottom, if possible. Proofgrade can work like this, to ride up on right over the crumb tray margin and put a steel bar on neodidlium magnets to push material down flat. On the right. only works for designs that stick to the left side.
It’s a conundrum. how to efficiently lay out first cuts on Proofgrade given the hard, proud margins of the crumb tray around the honeycomb. Need a honeycomb crumb tray with no margins except perhaps a lip on the edge to keep material from going into the rails.
Improvements to come sure but for those of us born to parents who grew up in the great Depression and were constantly harangued to scrimp and save and never throw anything out, that wasted variance in Proofgrade dimensions, crumb tray capacity and GFUI go/no go zone is quite the trigger.
This is one of the things I’m really looking forward to getting the Pro for: so I can trim the sheets to two usable pieces. I’m such a miser when it comes to laserable materials, I can’t bear to waste even 1/4" x 2" piece.
The only part of an apple I don’t eat is the stem after a thorough haranguing from a great aunt and her Great Depression stories. Lard sandwiches were featured prominently. The core is whatever, but the part of the apple just above the core is the sweetest and best part of it (minus the bitter stem of course.)
Hello @marmak3261 ! Have you used the Inkscape tabbed box maker with the medium proofgrade acrylic yet? I’m designing a planter box for a friend and wanted a really tight fit so that I wouldn’t have to use any glue and was wondering what the Kerf value should be. I’ve made one so far (using the default kerf setting) and the fit wasn’t as tight as I’d like it to be.
I haven’t done medium acrylic since I got my forever forge, but I can do a test tonight and let you know how it turns out.
There are several ways to test. One is simply to cut three exactly one inch squares out of the target material. If using Inkscape make sure measurement is done from the center of the line in preferences. Measure the resulting squares, you’ll have six ways to measure, then average the size of the kerf that you measure.
If I recall, I was using about .006 to .007 for a 1/2 kerf value for the medium acrylic but you really need to use a good calipers to measure your acrylic for its thickness.
You can also make a small shape like this to practice with. The text won’t import and you can ignore the measure lines in the GFUI.