Tutorial - Batch Production With a Jig

A number of people have mentioned their intent to use the glowforge for repeated creation of a design. I am currently in the process of doing that for some wedding invites, so I figured I would show you guys how im going about it, as you might find it helpful in your own exploits. This is going to be long winded, so be prepared.

Lets get started


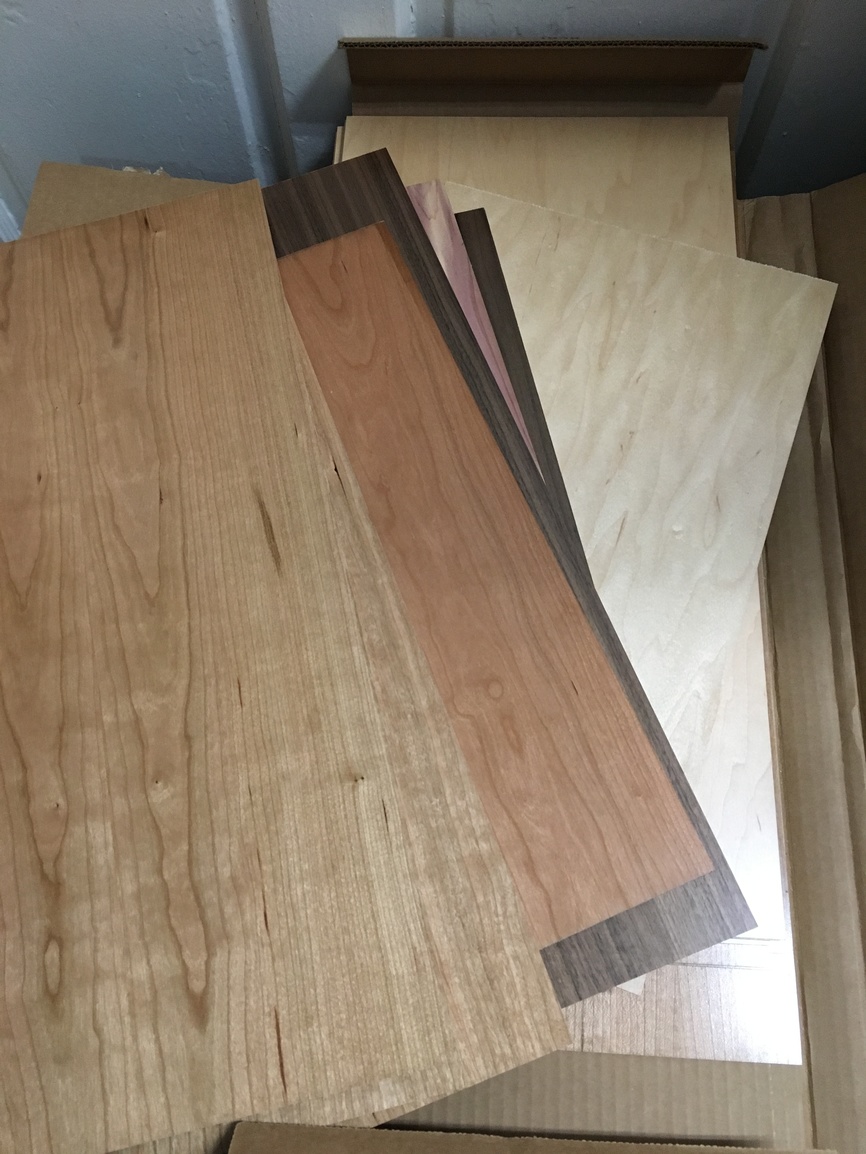
Some good friends of mine are getting married. They are both graphic designers and wanted some cool invites, and I happen to have a laser… so I said ‘of course!’. (sorry norm =P) They want me to make them a very large quantity of 4"x6" laser engravings of their design. (im not going to upload the design, but will use a placeholder for the sake of privacy). They wanted them made in multiple materials, so they ordered a number of sheets of laser ply from laserbits.com.

These come in sheets 23-7/8" x 11-7/8". That means a couple of things:

  1. The whole sheet wont fit on the bed, and
  2. I cant get 12 full sized invites @ 4"x6" out of the sheet. Theyre going to have to be a little smaller or Ill have to make fewer.

Ill have to figure out what is the most efficient method of doing this. Luckily they are ok with them being slightly undersized, so that gave me some leeway. I have to cut the sheets down, and every cut on my table saw will take off 1/8". I looked at a number of different options, but cutting them down to 11-7/8"x11-7/8" was the best looking option, as it had the least waste, and I only had to make 1 cut and 1 jig. So I chopped them down to perfect squares.

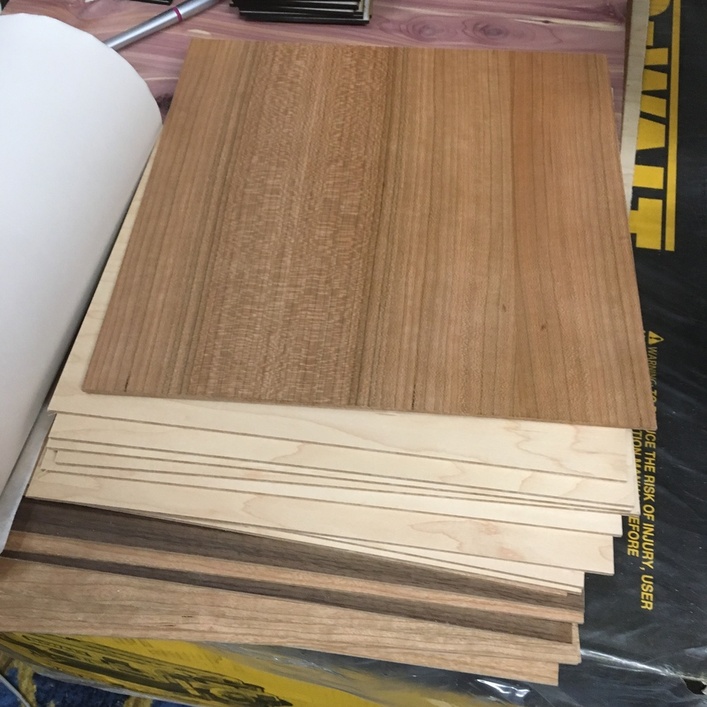
This left me with a pile of squares slightly larger than the engrave area on the y-axis(10.5), which meant I’ll have to engrave/cut half of it at a time, then flip it around to do the other half. Not a big deal. (3 invites will fit on 1 half, 6 total per piece)

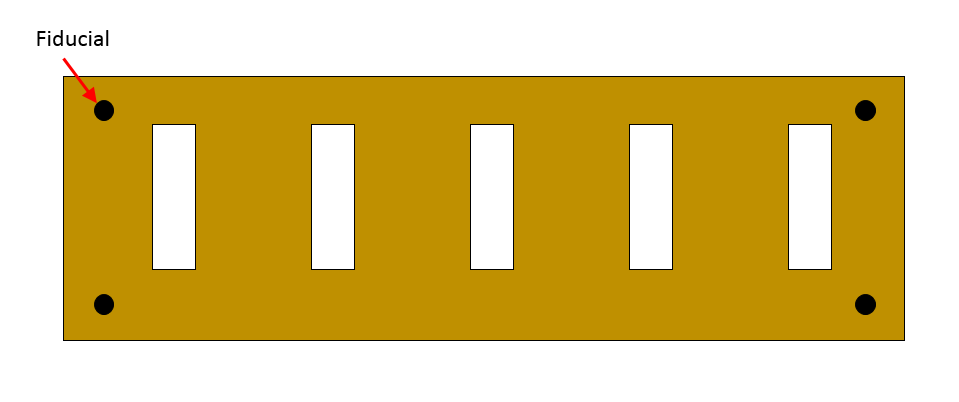
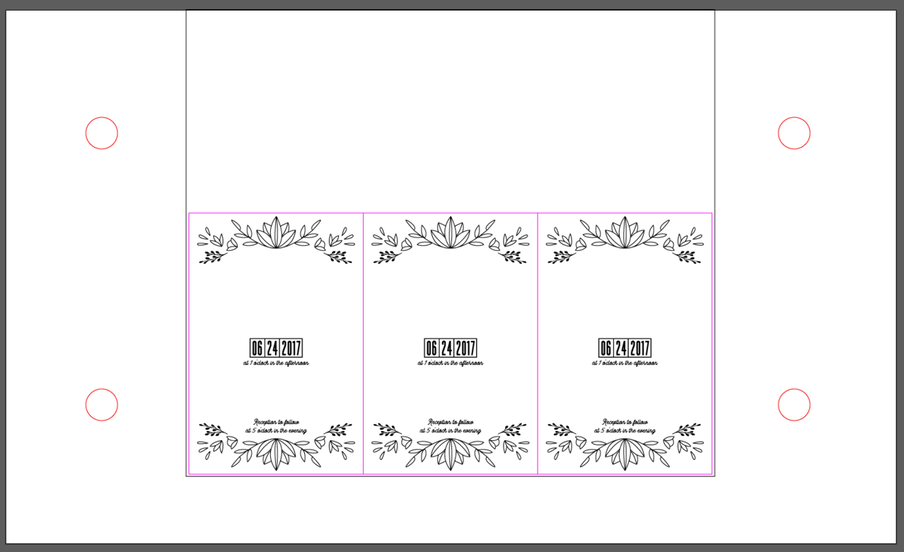
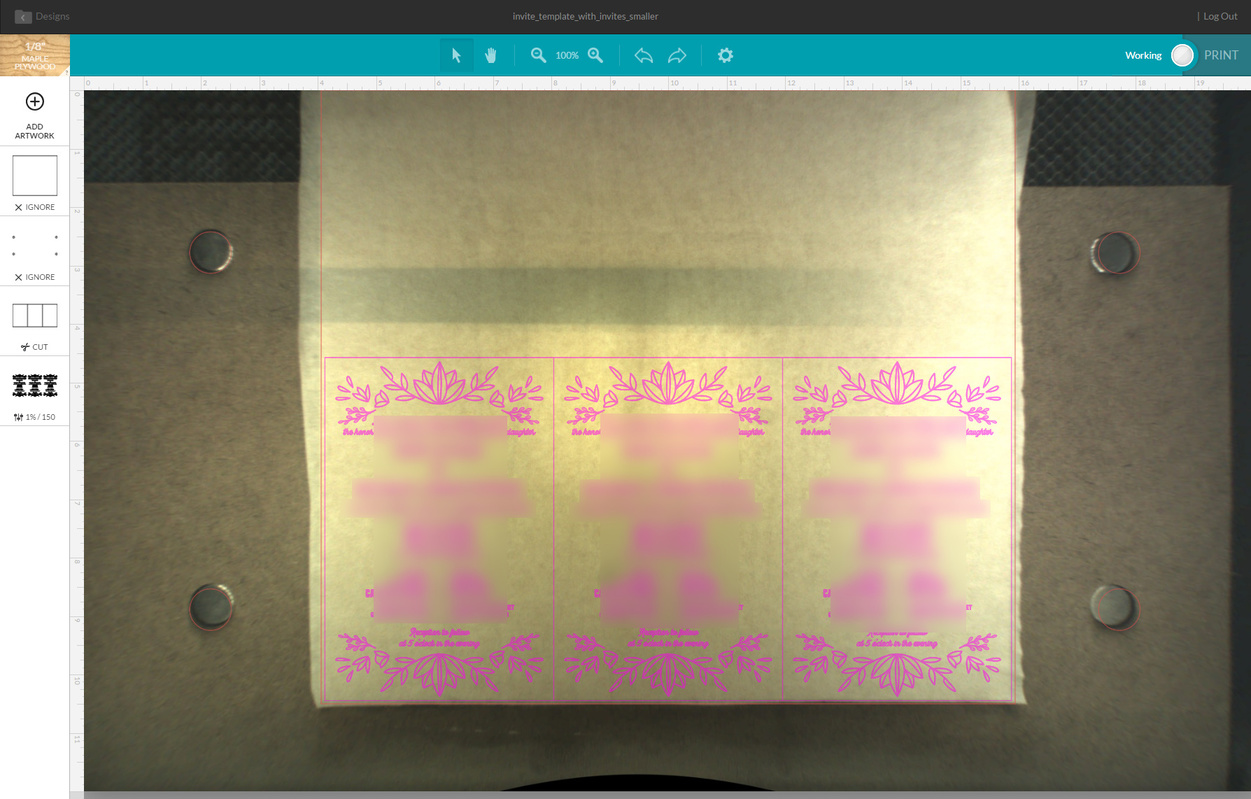
Now I had to see how sturdy of a jig I could make, because I was going to be doing a lot of these pieces, and I didn’t said want it to shift. This is where the quick hack that @dan and team put in a while back comes into play, and was really the only thing that made this work. (They made it so if you add an SVG with a 20x12 artboard, the items on that artboard would be positioned exactly like that in the GFUI. Thanks again for that guys. Great holdover til numeric positioning ;P). I created a 20x12 svg with an 11-7/8 square right in the top middle of it to hold the invite materials. Everything measured and placed precisely to the 100ths. I also remembered @karaelena 's debacle with his magnets, so I cut holes for mine to help hold the jig in place, and not fly up to the mothership!

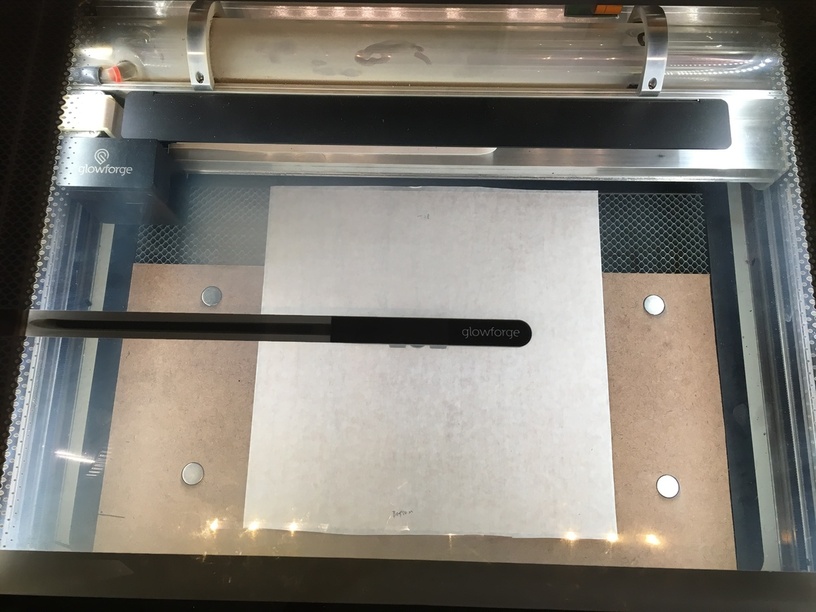
I tested first with cardboard, and that wasn’t going to work at all. I had a piece of hardboard that was also 1/8" thick and close to the right dimensions so I cut it down to the correct width. It was only 9" or so tall, but that didn’t matter, as I just needed something to hold the bottom half of the squares I cut in place. Here it is with magnets embedded and the first piece of material ready to go. I made sure that the jig was pressed snugly against the door, as well as the left side to the tray so that if for some reason it got bumped or moved, I knew to press it back against these two places to get alignment back as close as possible.

As these 6 invites should all fit exactly in this larger square piece, I thought it would be a good idea to let them stretch all the way to the edges of the piece to get as much out of it as possible. After the first run of 3 I determined this was a very bad idea for a number of reasons:

  • The outside edge was cut by saw, so the inside laser cut edges didnt match. The laser cut edge looked a lot nicer, and I wanted them all to be the same
  • When the laser ran around the outside edges, it was hitting the edge of the jig, and burning it back which would lead to a loose jig. We cant have that
  • As it ran around the edge of the jig, it had little to no material to cut through, so there was a lot of flashback from the bed on the backsides of the invites. No good.

This was a pretty easy fix (you can see the small gap I added in the illustrator image above). I just selected all of the invites in the template as a whole, and reduced their width by 1/8" (while proportionately scaling the height). This gave them 1/16 of space on either side to get a clean laser cut, for the laser to avoid the jig, and for it to have enough material for the laser to go through not to flash back. This was especially important between the two sections where the rows were really close together. Just the tiniest slice of material is left, and was enough to prevent damage.

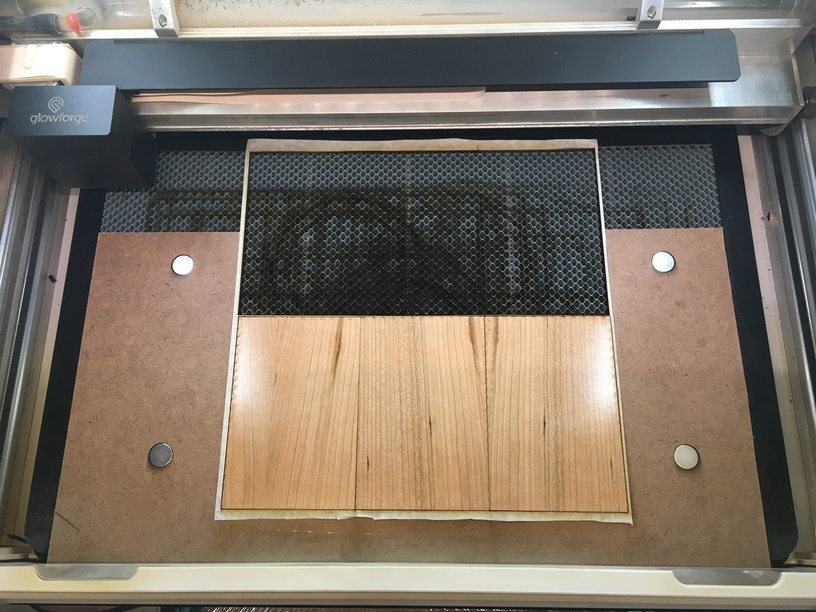
So this is how it looks for the most part. I turned it over to hide the wedding details, and show the flashback that was occurring before it was accounted for. Basically though, you cut 3, take them out, spin it around and cut the other 3 and then are left with about as little waste as is possible.

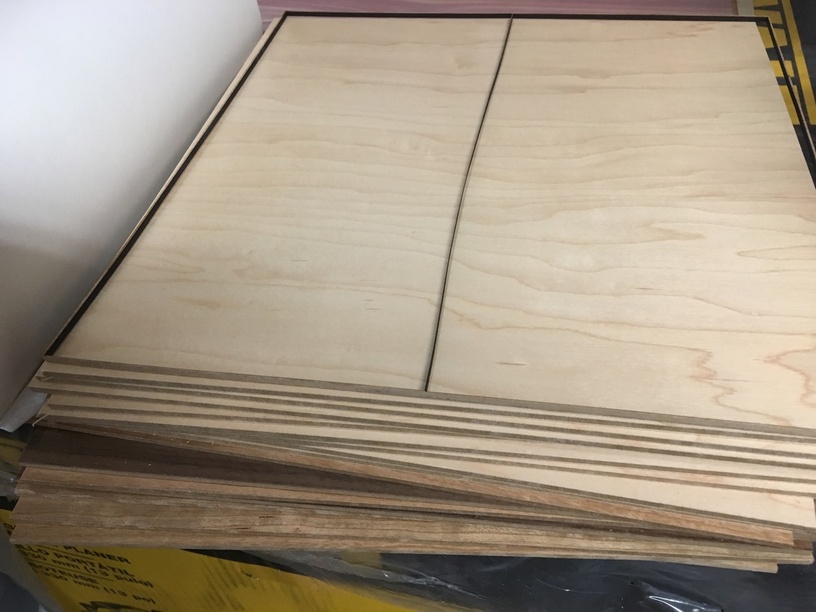
This is how much material is left over after each batch. Just a sliver of an outline from around the pieces. Paper thin.

As long as you continue to use the 20x12 svg with the design inside it, and dont move the jig, everything will be in the same place when you open the file every time, allowing you to be ok if windows decides to reboot in the middle of the night etc. This has worked pretty well so far for repeatability.

A real 0,0 and numeric positioning would prevent me from having to make this jig at all, and worry about it moving etc, but for the time being, and the task at hand, it allowed me to accomplish what I needed to.

Additional Photos


Here are some additional photos of what im doing:

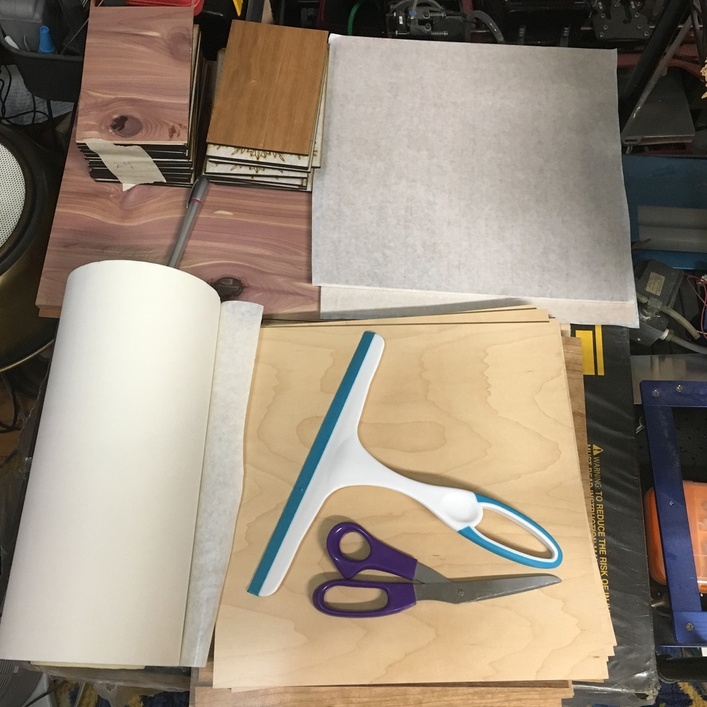
This is my prep station, I just slap some masking paper over whichever side has the coolest grain, then throw it on the laser. Already cut invites are in a stack on the top left there. Masked squares ready to be cut are on the top right. I have a squeegee to help get the air bubbles out of the masking material.

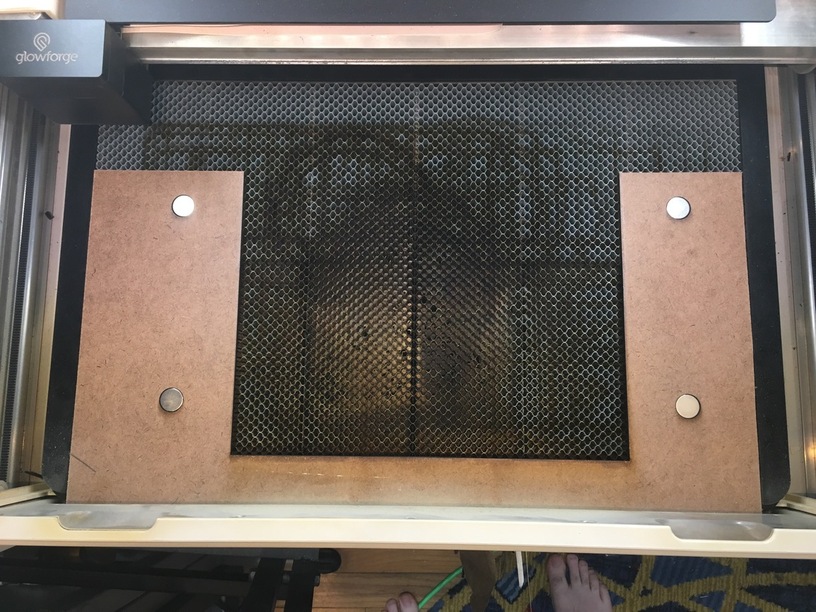
Another shot of the jig with magnets by itself. Oops… feet!

As always, let me know if you have any questions. Hopefully this will come in handy for you guys if you need to run some batch jobs.

106 Likes

Great tut!

2 Likes

Very nice. I’m happy to see a jig and the 12x20 hack working (I hope they keep that). I’m sure your friends will be pleased.

2 Likes

This is great! Thanks for sharing all the details. This will be very helpful to me.

5 Likes

Thanks for sharing. I hadn’t considered a squeegee. I’ll keep my eye open for one now.

3 Likes

Excellent! Thanks for sharing—having never used anything like this before this gives me a really good idea for where to start on cranking out multiple copies of a project. Appreciate you taking the time to document this.

2 Likes

What masking are you using? I don’t mask much - seems more work than running a clean up step. I get a little assembly line going unloading finished items, reloading, starting the next set and finishing the ones I pull.

2 Likes

Whatever masking laserbits sells. They purchased all the materials from there and had them shipped to me to make invitations.

I will say that masking beforehand is a LOT easier than cleaning up soot stains afterwards. Also… they get to do the weeding =P

15 Likes

I mostly use 4" 3M squeegees.

Signwarehouse beats amazon by a little bit, but doesn’t have free shipping.
https://www.signwarehouse.com/product-search-results?q=squeegee

They are even cheaper from a sign or wrap supplier like Fellers, if you have access to one of those.
I got a whole bunch for free from the last expo I attended.

2 Likes

Very cool @takitus!

Out of curiosity, how would you have expected this to work to be easier (the thing you describe as ‘numeric positioning’)? Even when I had other lasers that had steerable lasers, numeric offsets, settable 0,0 points, and all that, your approach is more or less how I would do this.

14 Likes

Thanks! If I had a physical 0,0 point I could just shove the piece of wood in the corner, and wouldn’t have to have cut the jig at all.

Out of sheer idiocy/experimentation, I decided to remove the bed and jig about half way through cutting all of the invites to see if I would have any issues getting everything back to where it needed to be.

I did… and it was quite troublesome to get them back to a usable position. The one saving grace was the magnet holes being present in the design, which I was able to use as a key of sorts to realign everything to. I put down some scrap material, recut the magnet holes into it, put the magnets in, and then pulled the scrap material off and laid the jig back over the freshly placed magnets. It still wasn’t as square as it was originally, but was close enough to get by.

This was actually a cool little discovery in making alignments in a system like this, which I will probably use every time I have to cut a jig until/if a 0,0 and numeric positioning are put in.

19 Likes

Thanks for sharing your process for these!

I just did some engraving on the laserbits walnut ply, there wasn’t a lot of contrast with how dark the wood is. Next time I think I might spray paint the engraving a lighter color before removing the masking I bet that would look great on these invites too! Ya know if your friends want to add another step before removing the masking :wink:

12 Likes

You’re welcome! Ha we discussed that when I made the original samples for them to check out. They really liked the walnut, but agreed that it was hard to read. The maple on the other hand was very easy to read but rather bland, so they decided on cherry as the main wood. They wanted to keep some diversity however, so they bought a large quantity of cherry, a medium amount of maple, and a small amount of walnut. We joked that we would send the walnut to those with the best eyesight, and the maple to older folks who might have a hard time reading. I told them if I got a maple invite they’d be getting a third tier gift from us haha.

Since I’m leaving the masking on for them, that might actually be a cool idea for the walnut. Maybe a brass or light bronze spray to lighten it a bit. I’ve done this on other things but hadn’t considered it here. Thanks!

17 Likes

Ah - ok. Unfortunately I don’t think that will happen any time soon, since a corner that prevented it from moving backward would prevent larger material from fitting (that extends towards the back of the machine) as well. I like your idea of an L-piece with fiducial registration on it, though.

9 Likes

Awesome! The 3 point fiducial ruler would be incredibly useful for many things.

An idea for a 0,0 corner outside of the L shaped ruler wothout having to add anything:

Just remove enough plastic to have a small gap/slot (maybe 1 inch) in the side rails of the tray which would allow you to lay down a ruler perpendicularly across the tray to act as the restraining guide on the y axis. Then all you would need is a standard 1" wide ruler

I know it’s a bit late in the game for that, as you’ve probably finalized all that stuff, but would be an easy fix going forward if you ever did decide to change.

6 Likes

Great idea!

5 Likes

Does all this talk of L shaped rules with fiducials being a good idea mean that double sided cutting is blown? If the second side can be aligned accurately by looking at the work piece edges with the cameras why can’t the first side be auto aligned? In which case there would be no need for any jigs at all once double sided cuts are implemented.

3 Likes

Would screwing a little aluminum tab in the back corner of the crumb tray that we could rotate up for work when we want the back positioned exactly/reliably and rotate down (sideways so it’s below the tray surface) void our warranty?

3 Likes

Here’s an idea, not sure how feasible it will be.

If you can recognize an L-shaped ruler with fiducials, could you make a jig with fiducials?

For example, say you want to laser etch a bunch of pens. You cut out the jig and etch in fiducials, which you can store in the Glowforge. When you go to etch the pens, you tell it you are using the Pen jig. It will look for the fiducials and etch accordingly. So you don’t need to square the jig to anything.

There are a few software additions that would have to be made for this to work though. You would need a “Jig” mode when creating and saving the Jig. And then you would need the ability to recall Jig so it knows where the fiducials are.

16 Likes

Thanks for taking the time to put together this write up and with the excellent pictures. I know we’re all busy so we appreciate all your work to show us the amazing things you can do with a Glowforge!

3 Likes