Purpleheart leather-wrapped box

Hello, my friends call me Box.


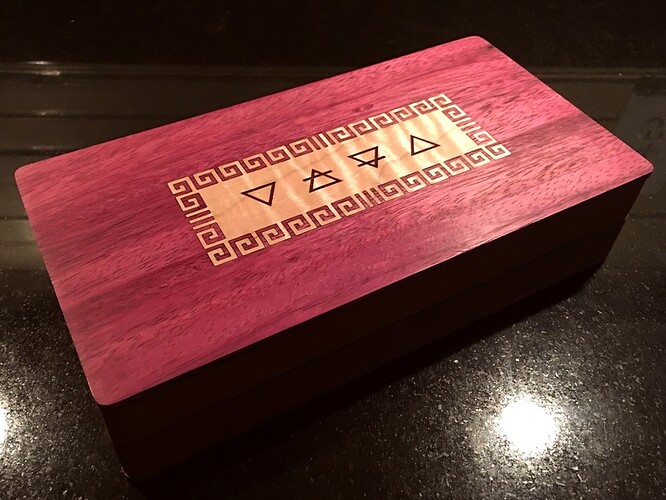
Purpleheart, Curly maple

This is a semi-clone of the recent layered box I posted here. That post is much more detailed and much of what I wrote there applies here.

Notes:

  • Of course this wasn’t the exact same size as the previous box. That would have been too easy. As such I had to pretty much design this from scratch.
  • The overall box dimensions are 7-7/8 x 3-15/16 x 1-13/16" ( 199 x 100 x 46 mm)
  • I took advantage of that to change the divider/edge thickness to be 0.2" (5mm) instead of 0.15" (3.8mm). I felt like .15 was a bit too thin, both aesthetically and structurally.
  • The inlay was much thinner and more fragile than the previous swirl design. Move slowly and carefully, it would be very easy to crack the greek key designs.
  • The purpleheart had a lot of surface imperfections that ran really deep. It required a great deal of sanding, and as such was quite time consuming. I suppose I should buy a high quality orbital sander, mine stinks, so i do things by hand.
  • All woods are 1/8", all exterior surfaces sanded to 2500 grit. In practice I don’t see a difference in surface quality past 1500, but here we are.
  • Wood surfaces were finished with clear Danish oil.

The inlaid curly maple is eye-catching. It shimmers noticeably as you move around the box. The purpleheart is no slouch and has a nice bit of shimmer to it, but it’s hard to compete with the maple in that regard.


Purpleheart, Curly maple

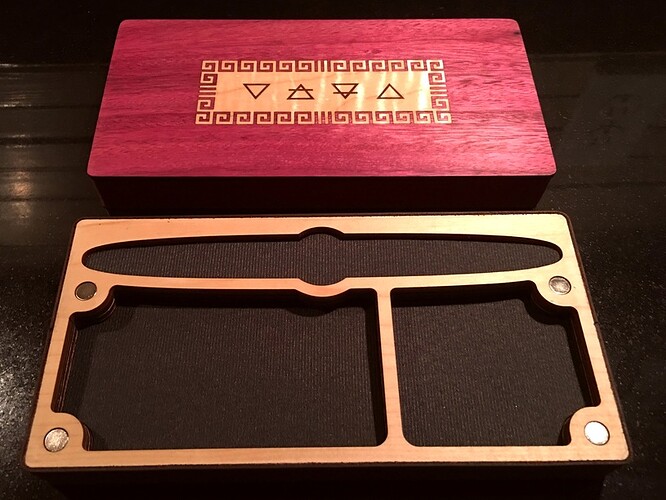
The box is designed almost exactly like my last one, 4 magnet pairs all set the same direction, polarity-wise. The inner visible layers are hard maple, not curly. This was for two reasons: I didn’t have any more curly maple to use, and it’s just not as visible. Better to just use the more common and less expensive plain maple. Not pictured: the bottom surface is solid purpleheart.


Purpleheart, Curly maple, hard maple headliner fabric, Neodymium magnets

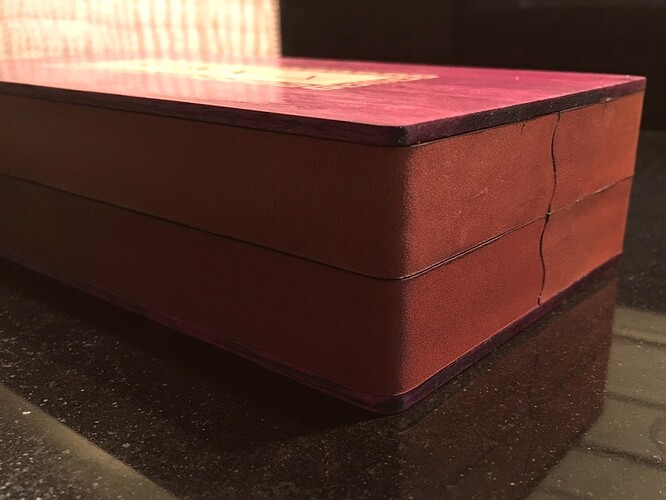
The edges are wrapped in cowhide leather this time. It was pre-finished, which saved me some steps compared to the last wrap job.


Purpleheart, Curly maple, cowhide

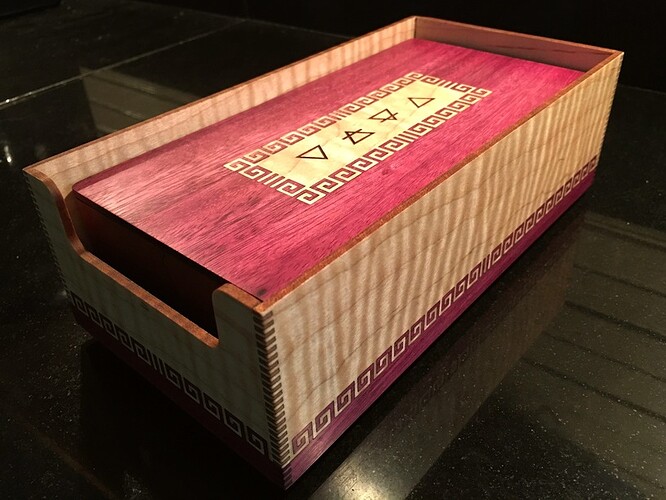
Like the previous box, this was also designed to fit a dice tray, both thematically and dimensionally. You can see the curly maple doing its thing on the dice tray, they really do complement each other very nicely. Oh also this may be the first time I posted pics of this dice tray, so… “Hi, I go by Tray.”


Purpleheart, Curly maple

Final thoughts:

If I did it again I would definitely steer clear of any woods with surface damage, the sanding was a drag and took far too long. It was just such a nice purple shade, my other purpleheart has gone a little brown… I couldn’t resist. But I paid for it.

Layered construction is always a little labor intensive, at least it is the way I do it – insisting on no visible registration dowels is fiddly. That being said, I think it is worth the effort to get the more refined end product. As a oneoff gift, yeah, do it this way. Trying to scale up for production? I wouldn’t recommend it.
50 Likes

I really like the purplewood join at the base of the dicetray - that looks so exotic!

Are you using any registration dowels at all - I saw you said “no visible”?

Could you use dowels where the magnets go? So the magnets hid the dowels?

2 Likes

Wow, that’s really beautiful.

2 Likes

These are some really lovely boxes you’ve been making. Strolling through your house must be like visiting a museum of wood!

4 Likes

First, thanks! It’s a pretty standard greek key design, I can’t really take credit for the squared spirals. I put a .5mm radius on everything, which helps prevent overburn on the inlays, and that’s where I ended up. For more on planar joinery, I have a mega post about it here:

As for dowels, your instincts are dead on. I used the same scheme I did in my previous box in this style:

A head-on view of the layout. You can’t see how it’s fully constructed by there are registration holes that accepted a dowel directly under the magnets and 2 more in the lower corners, making a total of six registration dowels. This kept the BB layers properly aligned for gluing. Six dowels may have been overkill but other boxes I’ve made with two felt like it wasn’t enough. And yes, I cut my dowels to length using the glowforge, of course. Saws are for suckers.

5 Likes

Most of what I make goes out the door as gifts :slight_smile:

5 Likes

That curly maple is gorgeous. I’m obsessed with it. I have some veneer, but that’s it, and I’m not yet talented enough to use it for anything at all. I’m just holding on to it until I build my skillz.

Maybe I need more talented friends as well!

1 Like

You only need to know kerf correction and basic engraving techniques to make a pocket inlay, even less if you want to make a cut-through inlay (which you can do with veneer very easily).

I believe in you! Kerf correction is a piece of cake.

3 Likes

Awesome. So jealous of your inlay skills!

3 Likes

Thanks :slight_smile: But literally it’s cut, kerf adjust, cut contrasting piece, flip one piece over, and carefully tap together “face to face” with a little glue. Super simple.

Let dry, sand flush. Voila!

5 Likes

Thank you. But I’m not touching that piece of gold until I’m sure I know what I’m doing. :wink:

2 Likes

Experiment with baltic birch and heavy construction paper? :wink:

2 Likes

I have a box project just waiting in my queue for snap marks to appear, and will be doing some inlay. Hopefully its as easy as you make it sound!

2 Likes

Perhaps. I bought a big pack of veneer samples, so I could also just pick one I don’t really care about!

1 Like

No snapmarks were harmed in making this box :slight_smile:

Someday, I’m sure I will get snap marks, I just don’t know when that might be.

3 Likes

That curly maple has gorgeous figure to it! :heart_eyes:

3 Likes

Ah, so beautiful.

3 Likes

Stunning! thanks for sharing the process…

2 Likes

Stunning work! So beautiful!

3 Likes

Your box making skills are out of this world. Incredible work.

2 Likes