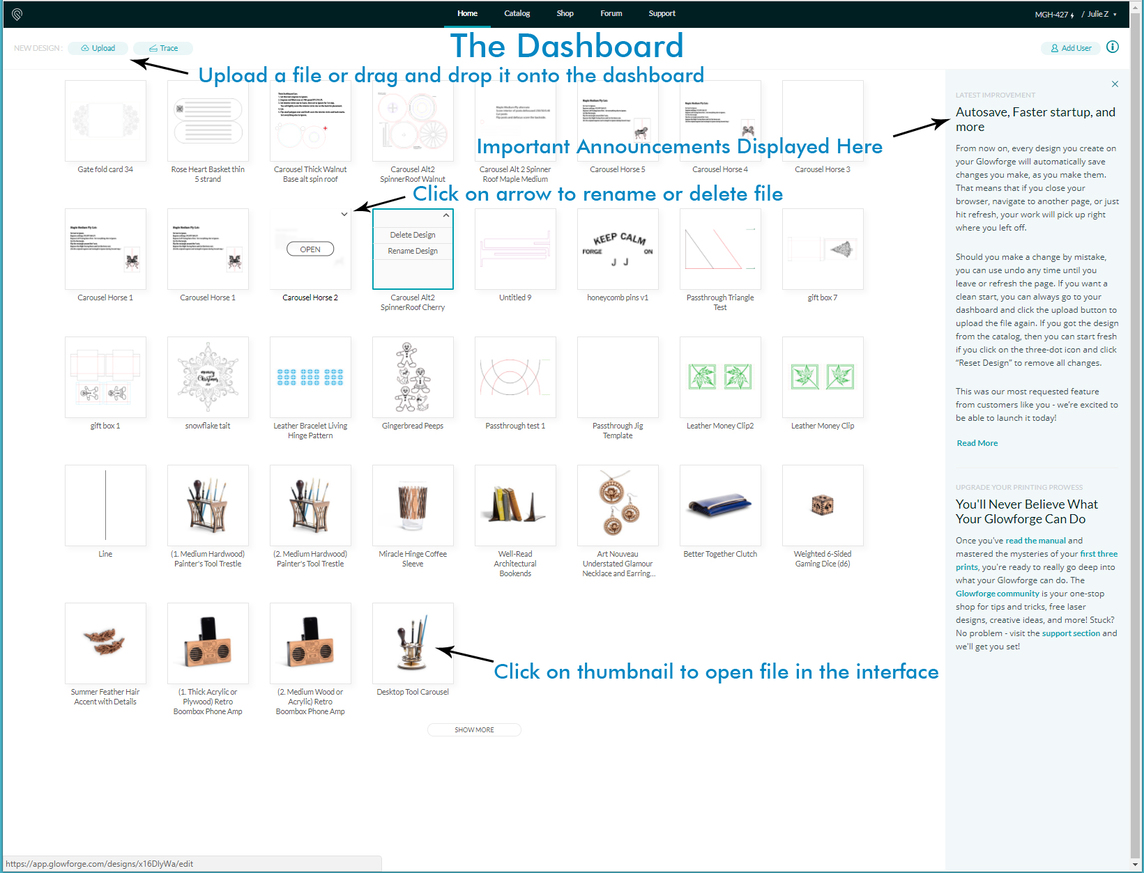
The Dashboard: Sign in to app.glowforge.com
Keyboard Shortcuts and Maneuvering in the Interface:
Copy (Select item)… CTRL/CMD + C
Paste (Select item)… CTRL/CMD + V
Undo … CTRL/CMD + Z
Delete (Select item) … Press the Delete key on the keyboard.
Update on Delete: _After the Autosave Settings Saver migration on 01/08/2018, if you delete a part or item from your file it will stay gone when you close it.
The next time you open the file, it will not be there.
If you wish to have a part not process without deleting it, drag it over onto the gray bar area. It will not be processed, but will still be available in the file for the next time, and your settings and placement on other items will be preserved by the Autosave.
Alternatively, create a copy of your uploaded files on the Dashboard before you open it if you plan to make changes to it and want to keep an untouched original available.
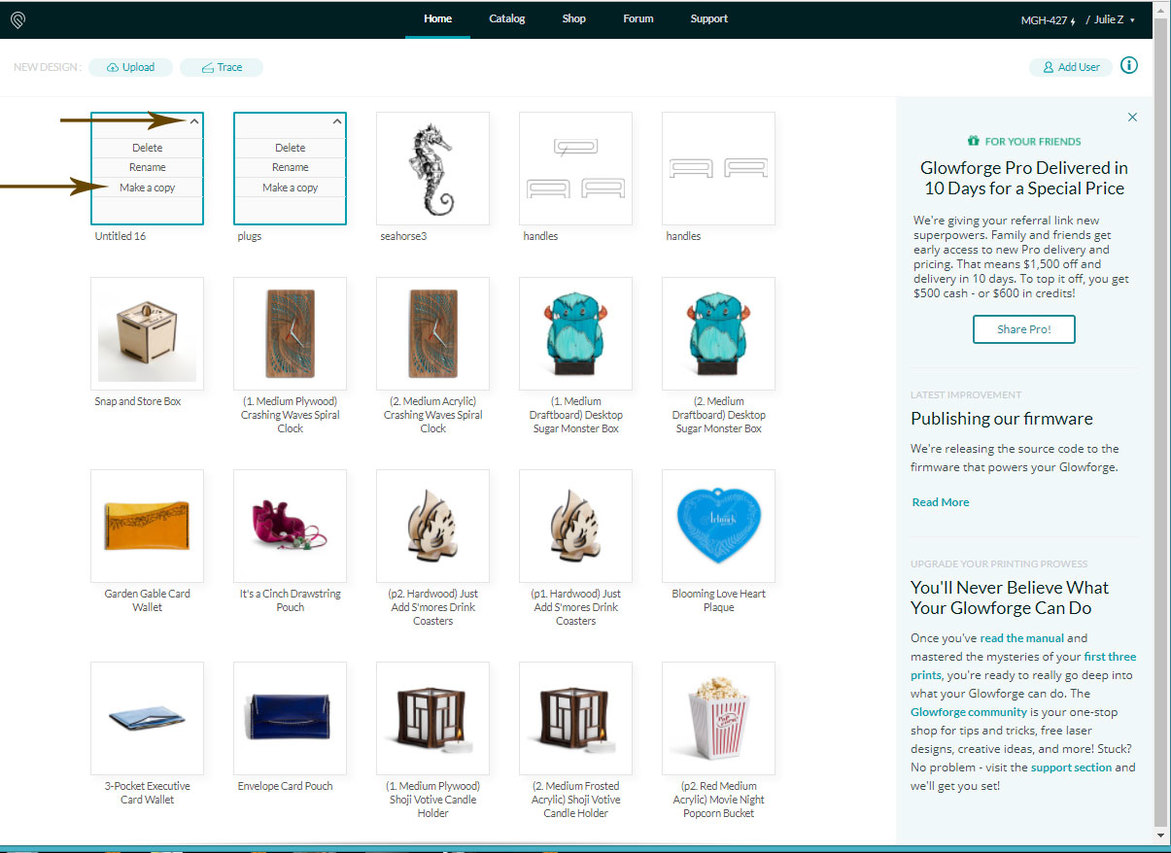
(Modified Catalog files can be Reset from the […] button on the work screen if you have accidentally deleted something that you later need.)
Zoom In and Out… CTRL/CMD + or - on keypad, or use the magnifiers on the top row of interface
Another method of Zooming is to…CTRL/CMD + use the middle mouse scroll wheel.
Move (Nudge) the placement of the image on the material:
Select the object and drag it, or use the Arrow Keys on the keyboard to nudge the object.
Move (Nudge) the placement of the image on the material in large jumps:
Hold down the SHIFT key while using the Arrow Keys on the keyboard.
…(note: the amount of movement for the nudges gets smaller the more you zoom in on the image, making extremely accurate placements possible. Zoom in and nudge.)
Rotate
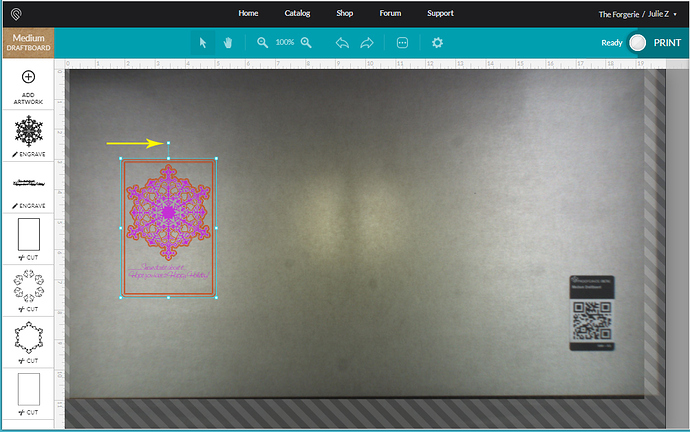
Drag on the little “circular arrow” handle at the top of a selected object:
Rotate through a fixed 45° angle while dragging in steps:
Click on the handle, hold, press down the Shift key, and rotate through fixed 45° angle clicks.
Scale an Object:
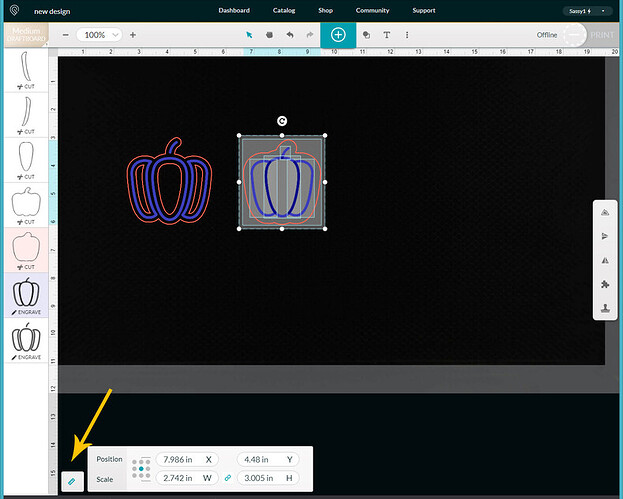
When an object is selected, a small ruler appears at the lower left corner of the screen…clicking on that will open the Measurements palette and the object can be resized and moved.
Pan :
Hold down the SPACE bar while dragging, or click the little hand on the top row in the interface.
Another method of Panning up and down is to use the middle mouse scroll wheel.
Selecting Objects:
- CTRL/CMD + A selects everything on the board.
- You can also drag out a selection rectangle to select everything inside.
- Partially dragging across an object (or touching it while dragging) selects it as well.
- And you can hold down the SHIFT key and click on individual objects to select them.
Important notes about Selecting Objects on the board:
-
If there are separate parts of a design that are inside a closed vector shape (like a circle or a rectangle) the GFUI (Glowforge User Interface) will treat all of the parts as a group, and you can click anywhere on it to select the entire thing, no matter whether parts are bitmaps or vectors, and no matter how many colors you have included for different operations. It acts as a single unit when you are dragging it around on the board.
-
But…if the outer shape is not a closed path, each part of the design inside is treated separately when dragging and selecting. So very complex designs with lines that cross over each other can be difficult to select entirely by dragging a rectangle around it. This is especially critical to be aware of when working with some CAD exports, since curves can be exported as short choppy segments instead of smooth curves, and they might look joined, but they actually aren’t.
The interface will deal with the disconnected segments without joining them first, but moving it around for placement on the bed is hard if the bed is crowded with shapes.
_To treat a bunch of unjoined segments as a group without having to join them, draw a single stroke rectangle around the shape, give it a different color than your other cutlines, and save the file. Then just set the rectangle to Ignore in the interface. You can move everything around easily.
Adjusting the Pickup on Bitmap (Raster) Images with the Trace Tool:
Couple of keyboard commands can help you to adjust the pickup on the scan results when using the Trace Tool in the interface.
CTRL/CMD + Up Arrow will pick up lighter strokes and marks on the paper.
CTRL/CMD + Down Arrow will reduce noise effects and light marks.
Holding Down the SHIFT key with either key command above gives a Turbo Boost effect. ![]()
.
Other Things you Can Do in the Interface
See Hidden Thumbnails.
If you have a complex design with a lot of colors and some of your thumbnails extend below the bottom of the viewing area, hover the cursor over the thumbnail column and use the middle scroll wheel on the mouse to scroll up and down to see them.
Change the Order of Operations:
If you want certain parts of your design to cut or engrave first and other parts second, you can change the order of the operations by clicking on a thumbnail and dragging it up or down in the column before releasing it. Operations in the thumbnail column are performed from the top down. If you want to have different cutting operations, assign a different stroke color to the different operations in your design. (Interior lines- red, outside lines - green.) You can also order the cut operations by the specific colors that you choose to use… Custom Inkscape, Illustrator, CorelDraw and Affinity Designer Color Palettes for ordering operations in GFUI.
Set the Material Thickness:
If you are using a non-PG material it is VERY IMPORTANT that you tell the Glowforge how thick it is so that it can focus the lid camera properly. Not doing so can cause a lot of alignment deviation, and your cuts can wind up falling into a hole in the material!
We now have two methods to set the material thickness:
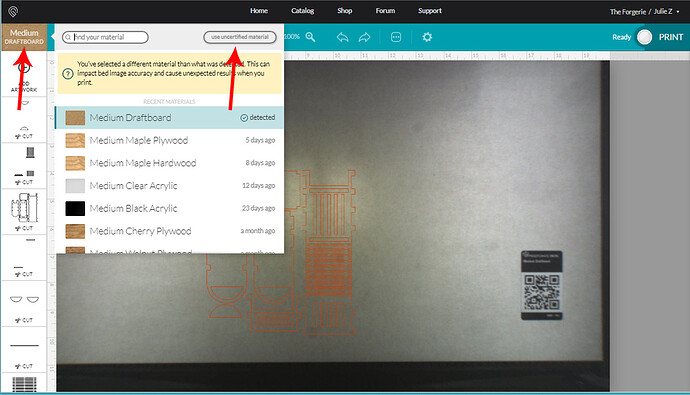
- Click on the button at the top of the thumbnail column, then click on Use Uncertified Material and enter the thickness of the material in whichever units you have set up for the display.
You can also use the left Search button in this palette to find the settings for your Proofgrade materials in case of a bad sticker (read error). Clicking on the material name will automatically load the correct settings for your Proofgrade materials into the correct slots for engraving, cutting and scoring.
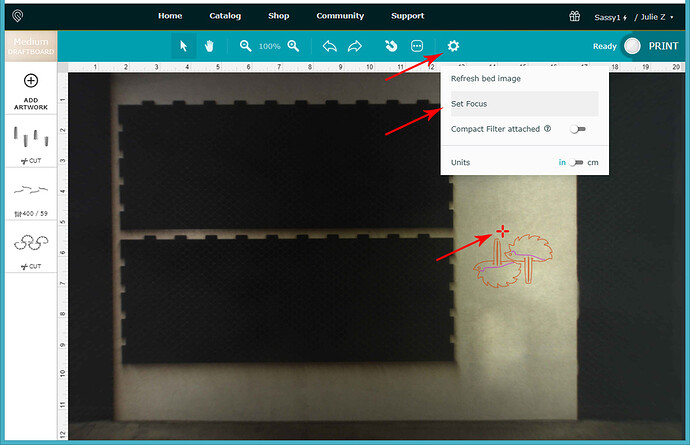
- The second method released on 04/29/2019 is to use the Set Focus button in the Gear settings icon.
Click with the red cross near the item you want to focus on to take a measurement of the thickness there for placement purposes.
Change your Default units to Metric and do some Math:
As of 08/01/2018 you have the option to set your units of measurement to Metric:
Locating your Design Parts on the Bed:
The thumbnails in the left column of the Glowforge interface describe individual operations. They can be engraves, cuts or score lines. Each one tells the GFUI that you want it to do something to certain lines or filled areas, and each one is differentiated from the others by using a different color to create it when you are designing the file. You do not have to set five different colors if you have five cuts, you can set one color for all the cut lines in a file, another color for all the score lines, and a different color for the engrave areas. Or any combination of the above. When you are designing, think in terms of how many separate operations you want to perform, and select that many colors to use.
In order to see which lines that operation will be applied to, hover the cursor over the thumbnail in the left column. The Preview on the bed will light up blue for the affected lines or engraves. Everything else will stay pink.
Change a Cut Line into a Score Line
The GFUI automatically treats unfilled strokes as Cut Lines when it loads a vector file. If you want to have that line be scored instead of cut, you need to specify that in the thumbnail.
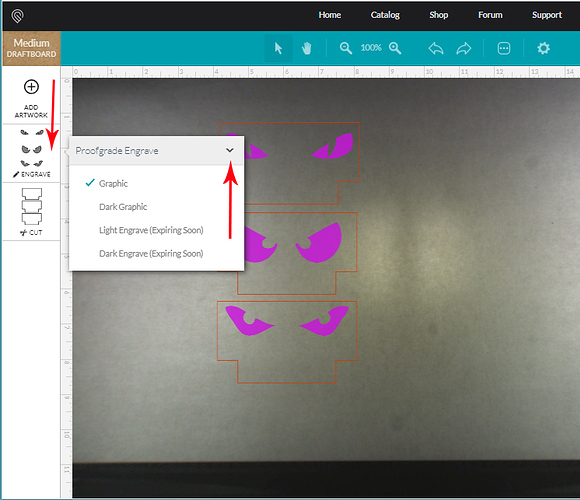
Click on the Thumbnail, then on the carat at the right
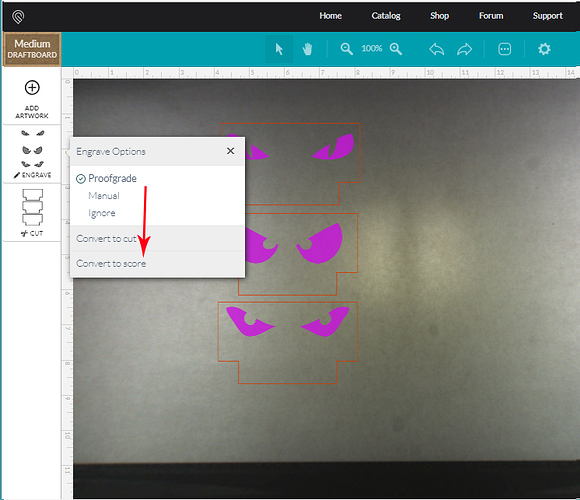
Then choose Convert to Score
.
.
.
Set an Operation to Ignore:
If you need to set an operation to be ignored in the interface, click on the Thumbnail for it, then on the carat, then choose Ignore.
.
.
.
Enter Manual Settings:
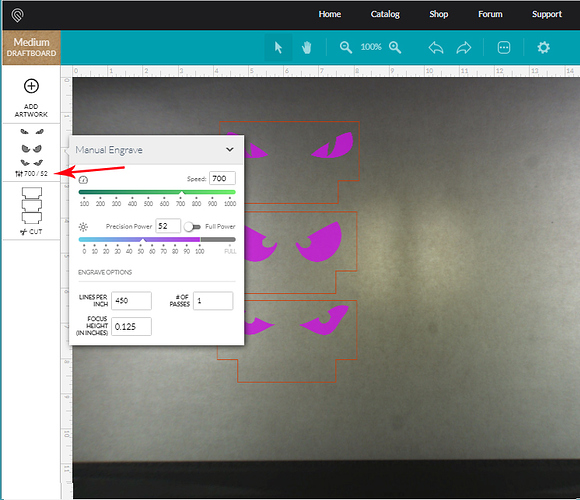
If you want to over-ride the default operation settings for a material, or set your own for an Unknown Material, you guessed it, click the Thumbnail, then the carat, then Manual. The most recently selected Proofgrade settings will be populated in the slots for the Proofgrade, and you can make small adjustments easily. When you are using Manual settings, the speed and power values selected will appear in the thumbnails once they have been set.
Upgraded: A recent upgrade to the interface now gives us the ability to save our own settings for non-Proofgrade materials. You can read about the improvements and learn how to use them here:
.
.
.
Refresh the Camera Bed Image:
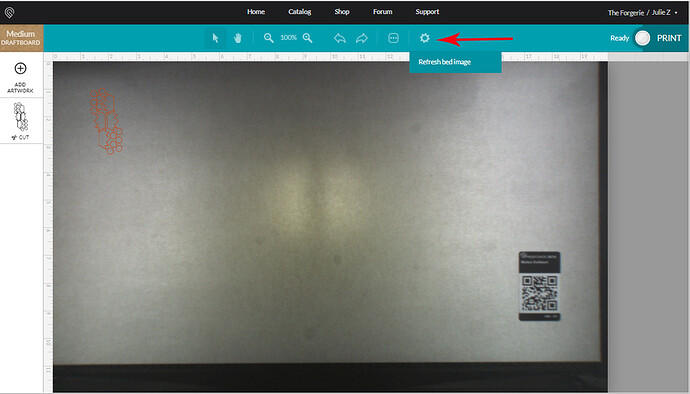
Click the little gear icon in the teal bar to get a new camera shot.
.
.
.
Get Instructions for Purchased Files from the Catalog
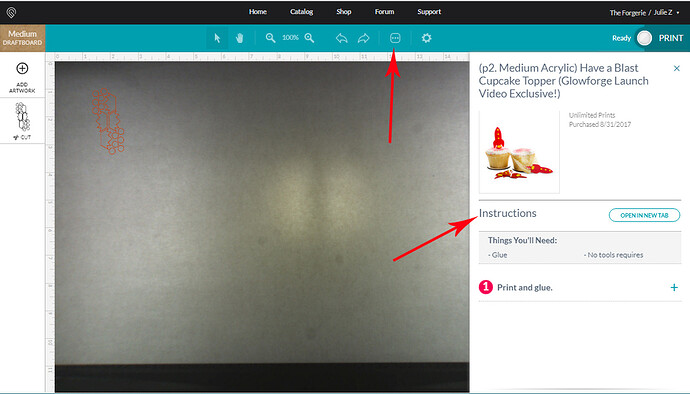
If you purchase a Catalog item with assembly instructions, click the icon shown to make them pop up in a side bar. Click back on the bed to close the bar.
.
.
.
Access Important Unit Cleaning, Maintenance, and Troubleshooting Information for your Machine:
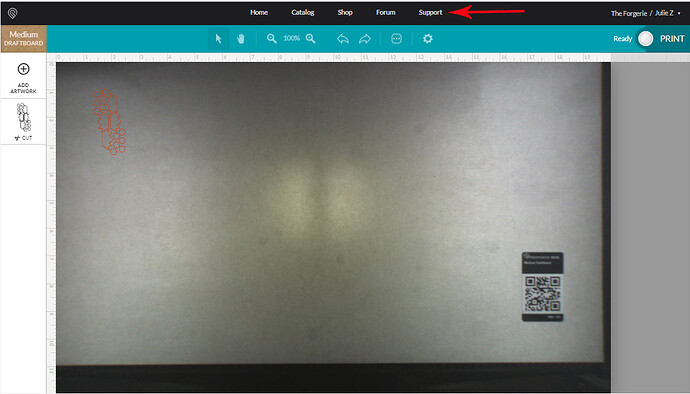
Click the Support Button. It will bring you to a section that has important troubleshooting steps that you can try to get the machine going again while they are still rolling out changes to the machines. Many of these changes will impact the machine temporarily and make it freeze up or produce unexpected changes, and a lot of these just require a reset to fix the problem. The first steps to try are listed here.
.
.
