The Trace Tool in the Glowforge User Interface can be used to scan printed artwork for engraving, and to create cut lines around the artwork, or inside the artwork, by clicking with the mouse.
There are a couple of ways to do things with the Trace Tool.
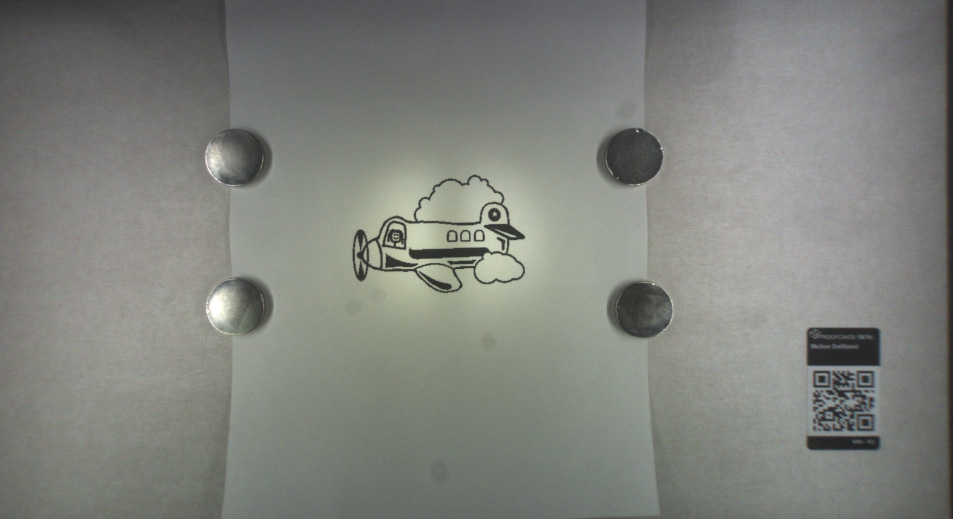
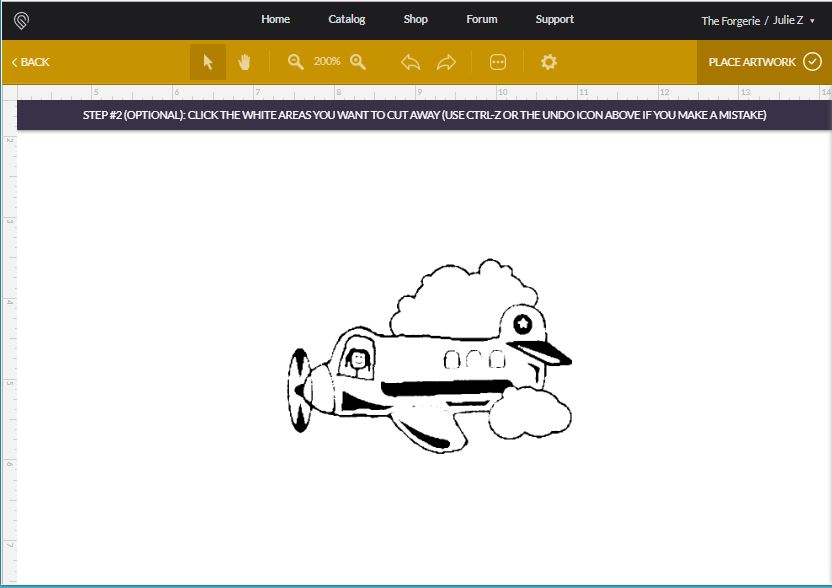
(I’m going to borrow one of Glowforge’s freebies to demonstrate since my drawing skills are non-existent. I printed this airplane out - pretend it’s hand drawn.) ![]()
Procedure To Scan a Physical Drawing and Add Cut Lines:
-
Black ink drawings on white backgrounds will give you the best results for tracing. (Smudged lines and pencil drawings are going to give you smudged results with the scan.)
-
Turn on the Glowforge and let it run through the startup calibration.
-
When it’s done, open the lid and place the image to be scanned under the lid camera. Secure the paper flat with magnets or tape to reduce shadows.
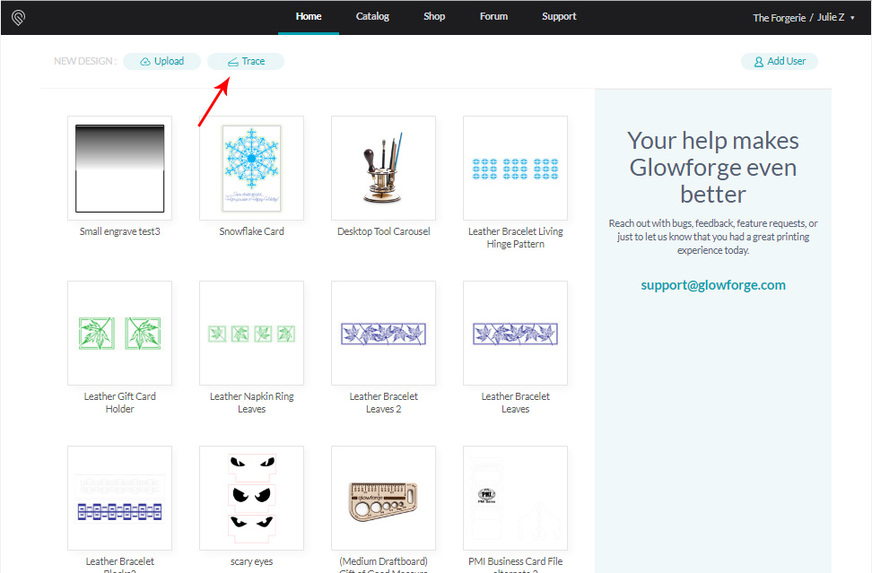
- In the Glowforge Interface, click the Trace Button.
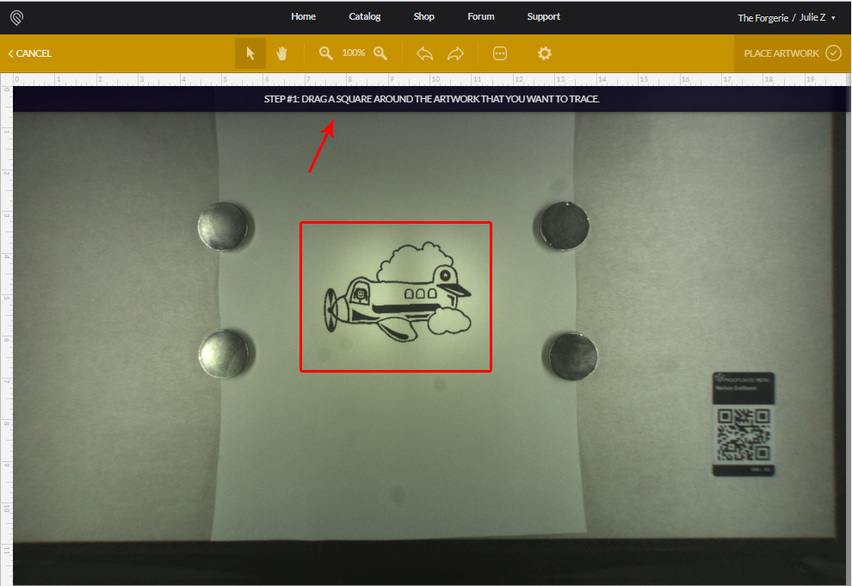
- Click and drag a square around the artwork that you want to trace. Handy instructions will appear in the black bar to guide the process.
(Keep it compact around the drawing, you don’t want to have to deal with the magnets in your scan.)
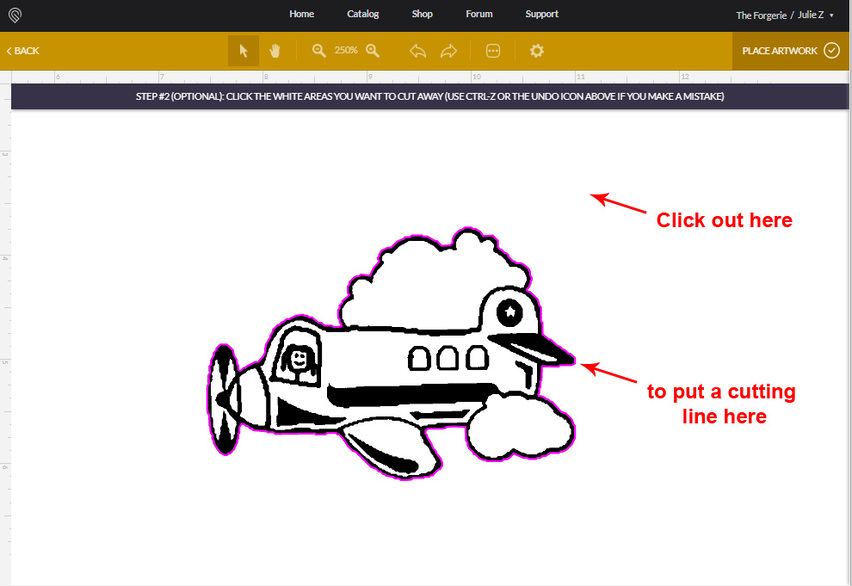
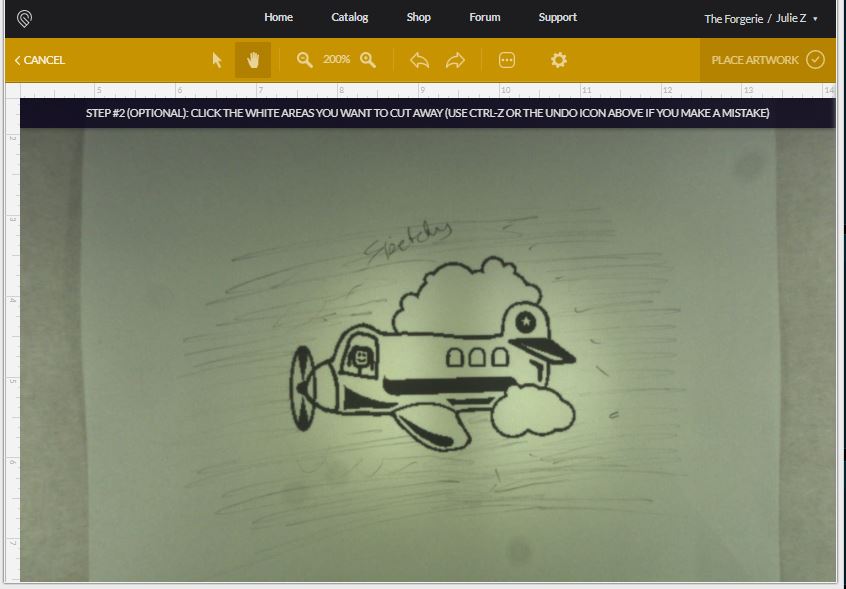
- After you drag the box out, the screen flips to the “Add Cut Lines” step.
(This step is optional, if you want to place cut lines or cut outs around the drawing.)
Use the Zoom tool at the top to Zoom in so you can see what you are clicking on.
Note: On this screen you can also use the CTRL/CMD + Up and Down Arrow Keys to change the amount of data that is being picked up for the engrave, if needed. See final example at the end.
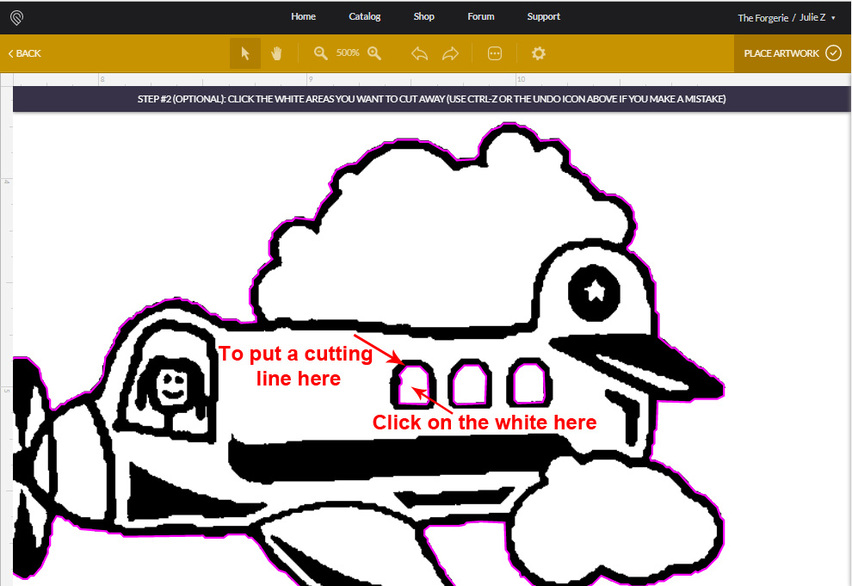
To add cut lines, you will want to click on any WHITE areas that you want to remove from the image.
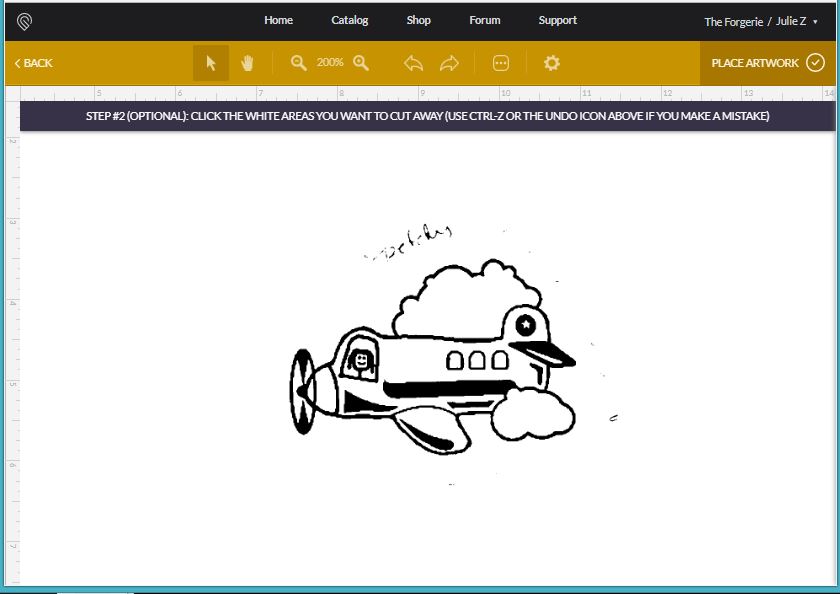
Examples: If you want to place a single cutting line around the shape, click on the white background. You will see a pink cut line appear around the shape.
.
If you decide you want to cut out the windows too, click on the white inside of the window areas to add more cut lines.
.
.
.
The algorithm that creates the cut lines is searching for edges where there is a color change, from white to black, or black to white, and it inserts a cut line in between them.
If you click directly on a black line that has white on either side, you will see two cut lines created - one on either side of the line, where the colors are changing at the edges.
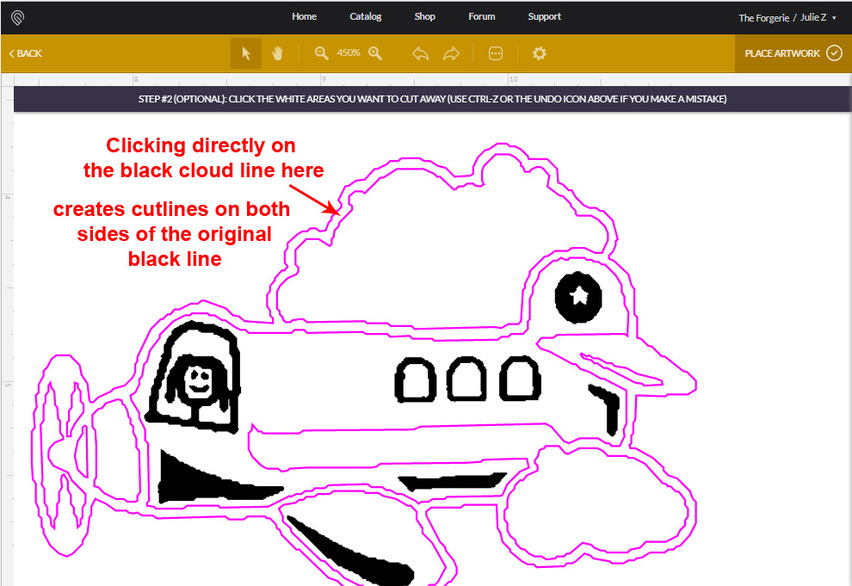
It’s easy to see on this drawing because it has thick lines. But it can sneak by you if the lines of your drawing are thinner, and you accidentally click on a black line. It will create double burn lines right on top of each other, and you’ll probably ruin the cut. It’s just something to watch for.
-
If you make a mistake adding cut lines you can use the Back button to start over, or just use CTRL/CMD+Z to undo. When you have finished adding all of your cut lines to the image, (or none, if you want to cut out some other shape), click the Place Artwork button.
-
Open the lid and remove the paper and magnets. Put in your material that you want to cut and engrave on.
-
If you are using non-Proofgrade material, you need to:
1. Measure the thickness with calipers and enter that value into the Unknown Materials slot at the top of the thumbnail column, or use the Set Focus tool.
2. Enter your Manual engrave and cut settings.
(If you are using Proofgrade material, that information is loaded for you when the QR code is scanned.)
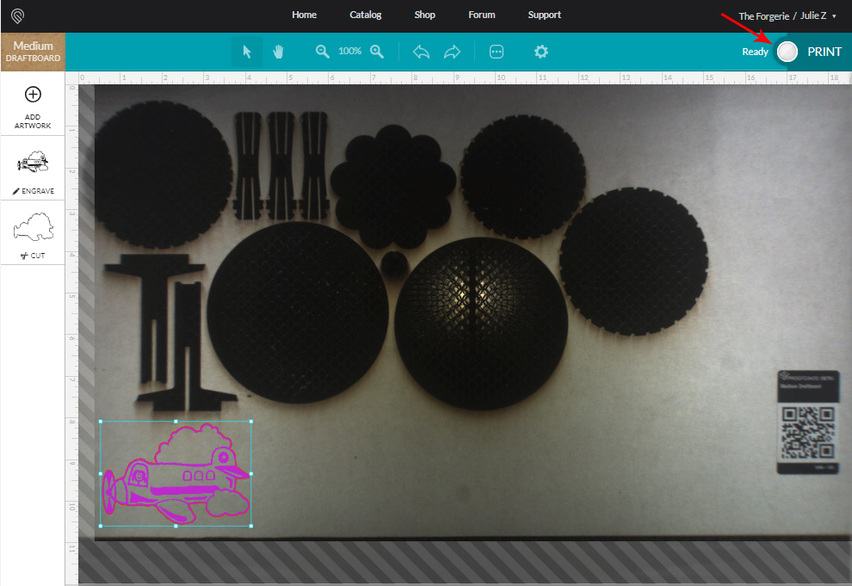
- Place the artwork where you want it on your material and send it to Print.
.
.
Procedure to Add a Different Vector Shape for Cutting:
Okay, so, say you don’t want to cut out tightly around the plane, you just want to scan it to create an engrave, and use some other vector shape that you have created in outside drawing software to use as a cutting line.
Very easy to do. ![]()
Follow Steps 1 through 5 above, but when you get to step 6, skip it. Go ahead and click the Place Artwork button without setting any cut lines.
You’ll get just the engrave.
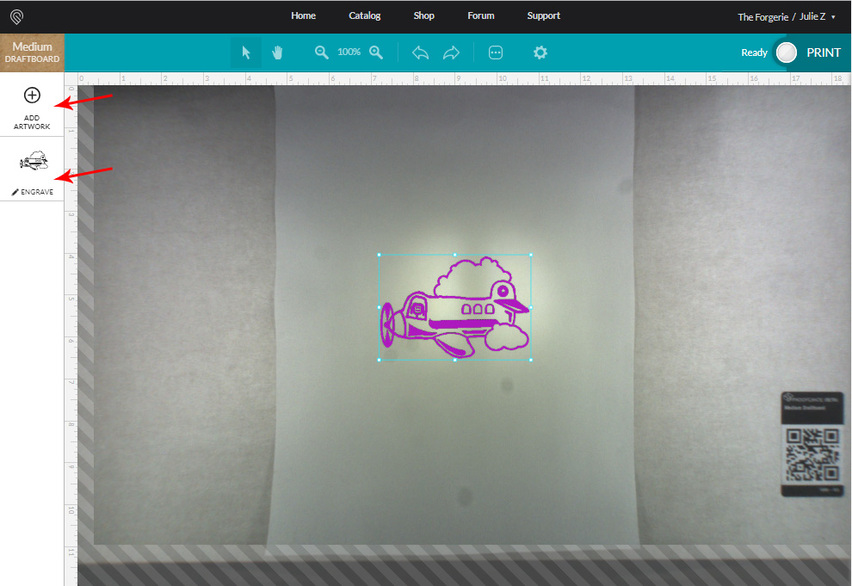
If you have a prepared SVG of a circle or square that you want to use with the engraving, you can either drag and drop the file from your desktop onto the artboard, or click on the Add Artwork button to add the file.
Arrange the cuts and the engraving the way you want them, and then proceed to set your settings and Print the file.
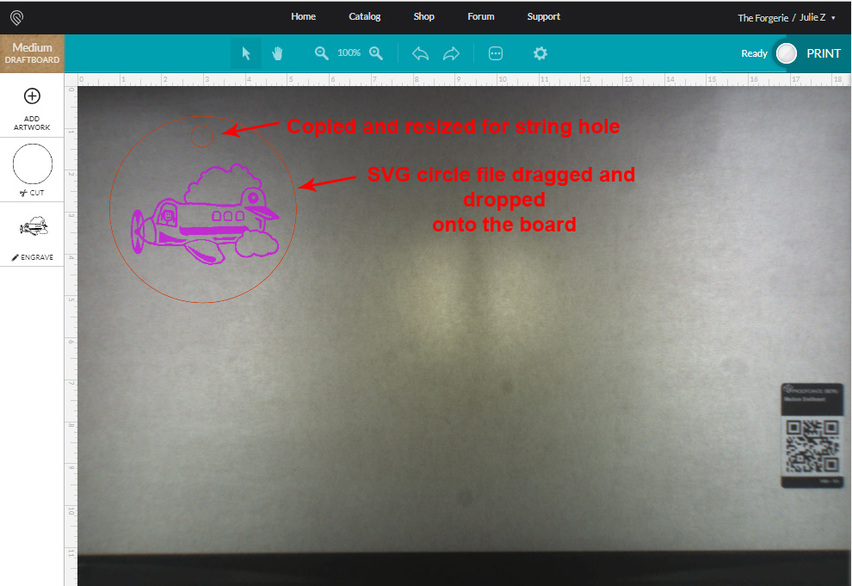
Note: If you want to move all of the parts after getting them placed, you will need to drag a selection rectangle around everything. These are treated as separate components since they were not created together.
**
Cleaning Up a Messy Drawing
**
After the Glowforge has scanned your print, you have the option of adjusting the scan results somewhat using the key commands for the Trace function.
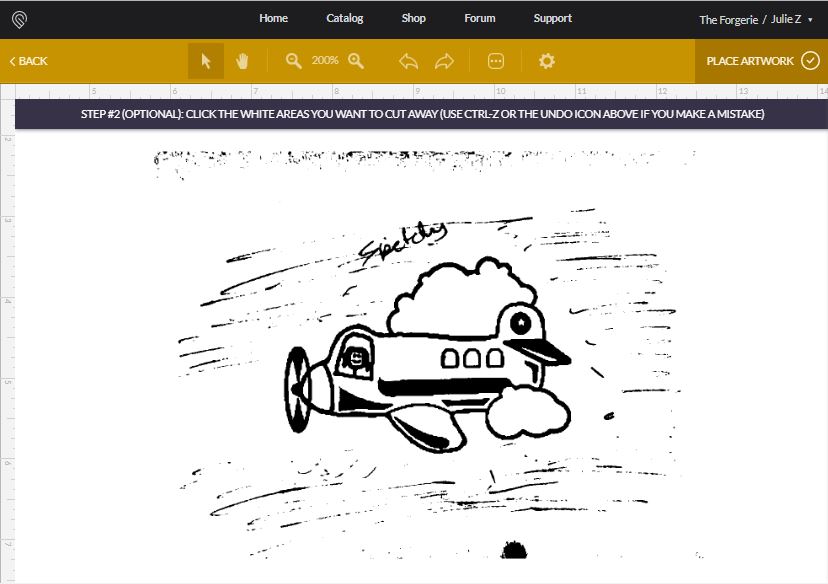
Here’s our drawing with a few smudgy pencil marks added:
Original scan results look like this, not bad considering…
But say I actually wanted all of those pencil marks in there as a design element… holding down the CTRL or CMD key and slowly clicking the Down Arrow on the keyboard increases what gets picked up in the trace:
Going the other way, CTRL/CMD + Up Arrow will drop a lot of the noise and stray marks, but it also starts cutting into your shape a bit. (If there are only a couple of stray marks, you can try dragging a box around them and CTRL/CMD+X to cut them out, depending on how things are grouped.)
Best practice is to start with as clean an image as you can.
Note: Solid blocks of some kinds of scanned black inks can do a weird reflection thing because of the bright lights of the machine…just use these keyboard shortcuts to adjust those out if you see them pop up in the engrave results. CTRL+SHIFT+Arrow to fill in the gaps.


